You’ve asked, we (finally!) answered: v10.2.0 of Dada Mail supports CAPTCHA on the initial signup form!
Although the app has supported CAPTCHA for many years for a whole bunch of things in the app, we never added support for the initial signup form. We were worried about the usability of forcing your potential subscribers to solve a CAPTCHA.
Why have we changed our minds?
Google’s latest reCAPTCHA system is a whole lot more usable to work with, and the threat of abuse on things like newsletter subscription forms is just not going away. So, why not make support at least an option? Those who would like the subscription form to work as it always has still can. Everyone else can enjoy the enhanced security. Seems like a big win.
Another big change in Dada Mail’s CAPTCHA system is that we now only support the latest version of Google’s reCAPTCHA system (version 2). In the past, we also supported reCAPTCHA version 1, as well as a CAPTCHA system based on, Authen::Captcha. To keep the code simple and bug-free for something so security-specific, we’ve removed these other choices.
Setting up Google reCAPTCHA in Dada Mail
Create a Site and Secret Key Pair
Sign up for the Google reCAPTCHA service at,
http://www.google.com/recaptcha/admin
and create a site and secret key pair for the site you have Dada Mail installed at, as outlined here:
https://developers.google.com/recaptcha/docs/start
Make sure you record both the site and secret key somewhere safe – we’ll be using them, later.
Configure Dada Mail to use Google ReCAPTCHA
Plugging in the site and secret keys, and telling Dada Mail to use Google reCAPTCHA is done in Dada Mail’s global configuration. The easiest way to work with that is through Dada Mail’s included web-based installer, so an install or upgrade would be the perfect time to set all this up. If you have v10.2.0 (or later) of Dada Mail installed, you can also drop back into the installer to make these configuration changes.
Once in the installer’s configure screen, look for the Advanced Options. This is where you can setup the plugins/extensions, as well as many of Dada Mail’s more advanced features. If you do not see these options, click the button labeled, Show/Hide Advanced Options…
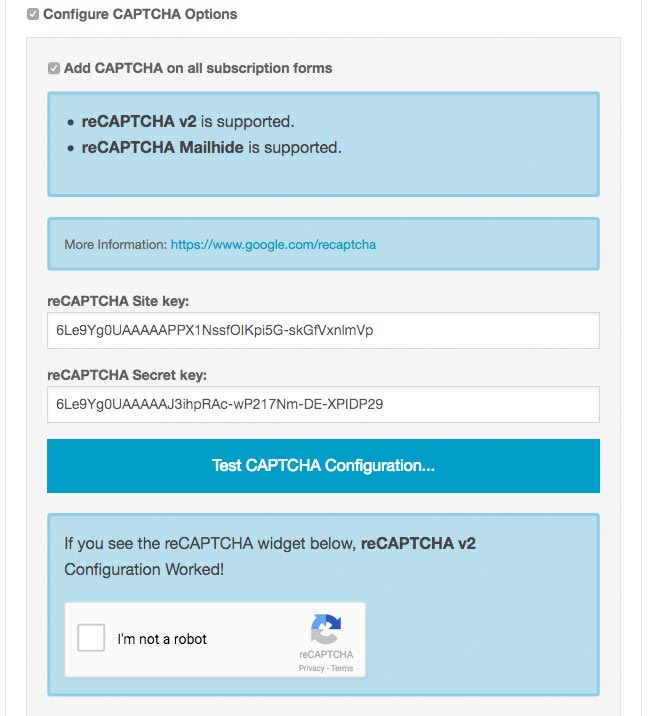
Next, look for a checkbox labeled, Configure CAPTCHA Options. Check the box, and the CAPTCHA options will be revealed.
Check the box labeled, Add CAPTCHA on all subscription forms if it’s not already checked.
Now, you’ll need to plug in the site key and secret key in the textboxes labeled, reCAPTCHA Site key: and, reCAPTCHA Secret key:
Once that’s all set up, you can test to make sure if everything works, but clicking the button labeled, Test CAPTCHA Configuration… If everything works correctly, you’ll be shown a working reCAPTCHA v2 widget!

And you’re done! Complete the installation process, and enjoy a CAPTCHA-full Dada Mail.
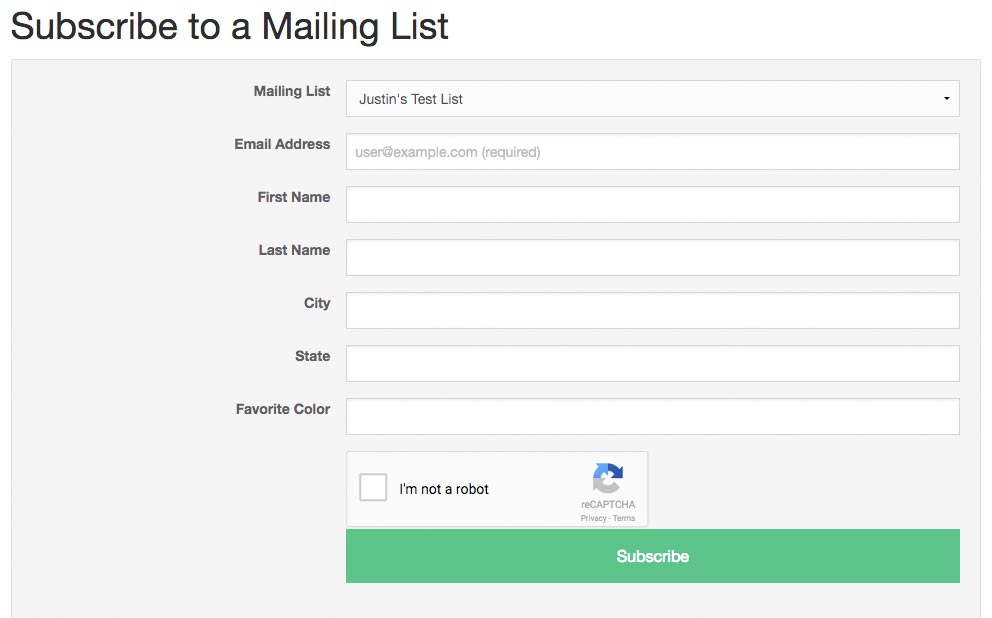
Here’s what my own subscription form now looks like, with the added reCAPTCHA widget,

Just remember, if you have a subscription form that you’ve added directly to your website, and you have CAPTCHA now configured, those forms will have to be updated. The code available in the list control panel under, Appearance: Subscription Form HTML will do the trick.
Missing CPAN Module?
Dada Mail’s Google reCAPTCHA support requires the Google::reCAPTCHA Perl module, which you can install from CPAN in a few different ways.
Need More Help?
We offer installation services for Dada Mail, including setting up Google reCAPTCHA for your site. See all our installation services here.
