v11.11.x Features: Using the new Landing Page Subscription Form Options

Dada Mail supports a variety of ways to add a subscription form to your site. From having simple HTML code blocks to copy and then paste into your own page’s HTML, to Javascript-backed forms that show the results in a modal window, to RESTful API’s to roll your own subscription schemes – there’s a lot of options.

We’re going to talk about one of the easiest ways to integrate a subscription form into your site: using one of the landing pages.

Dada Mail has the ability to just show the subscription form in a web browser and nothing else. Using these landing pages just means creating a link to the page and having your visitors visit it.

Advantages of linking to the subscription page include never having to update the subscription form itself when you change the list settings. As long as the list exists, the subscription form on this outside page should always work.

Another advantage is that you could embed/include this subscription landing page into a modal window that pops up using Javascript, and know that everything that needs to be there, will already be there with no additional coding.

If you’re using a platform like WordPress, there’s a variety of plugins that’ll allow you to create a modal window, and add the subscription form into it just by giving the plugin the landing page’s URL. Dada Mail also comes with the ability to set up its own modal window,and below we’ll show you how that works.

Log into the list control panel of the list you want to work with. Navigate to, Appearance: Subscription Form HTML. The first tab is what we want, labeled: Landing Page. From here, there’s two options. The first, Full Landing Page, will show the subscription form with the full layout/design of the screen, as well as the subscription form itself. Here’s an example from our own mailing list:

https://dadamailproject.com/cgi-bin/dada/mail.cgi/subscribe_landing/dada_announce/

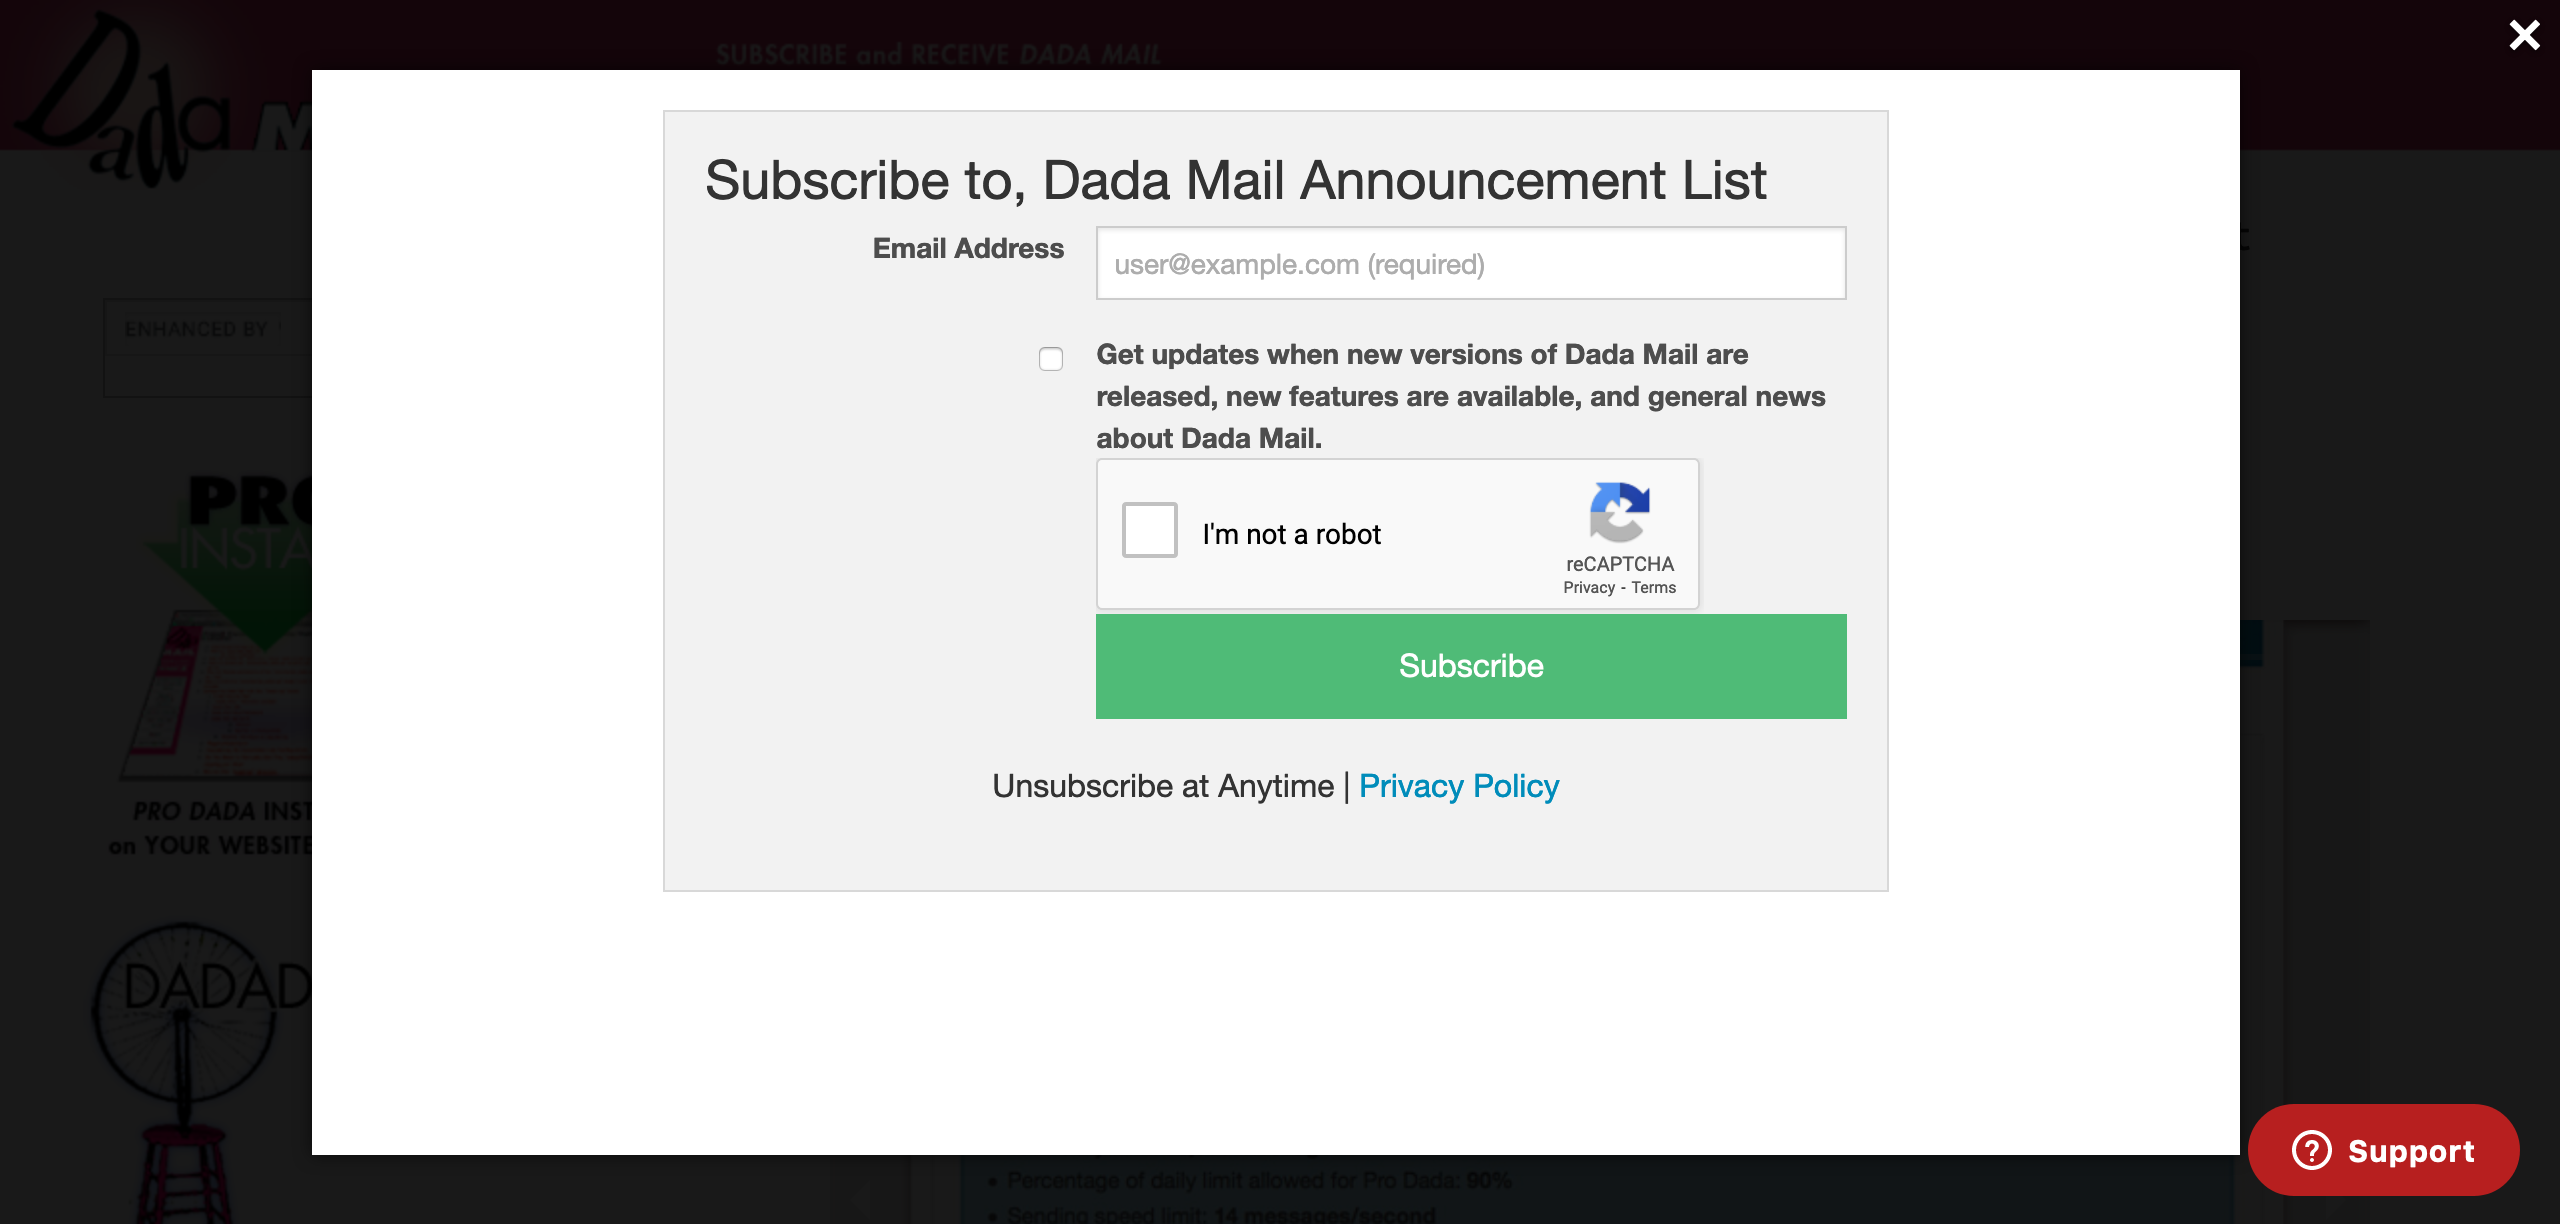
The second option is what we’re more interested in: Just The Subscription Form:

https://dadamailproject.com/cgi-bin/dada/mail.cgi/modal_subscribe_landing/dada_announce/

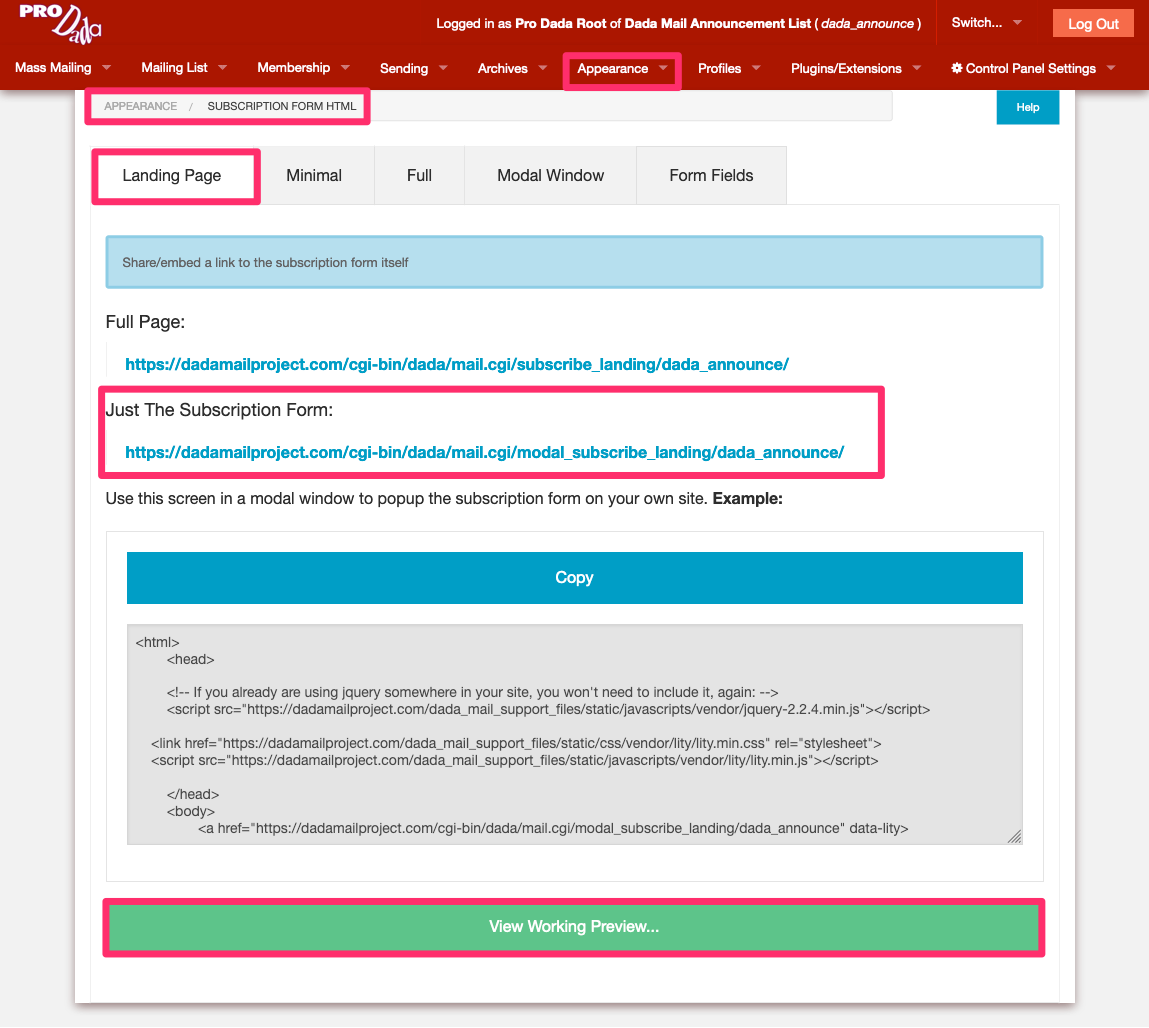
This will show well: just the subscription form, and nothing else. This is what can then be easily added to a modal window that you then pop out using an outside JavaScript library or platform plugin (among other options that may be available to you).

Dada Mail comes with just such a Javascript library called, lity. We chose to include it in our distribution of Dada Mail, because it was small, lightweight, and didn’t come with too many prerequisites, which makes it easier for you to utilize it yourself.

Dada Mail presents you with all the code you’ll need to wrangle both lity’s popup modal window and Dada Mail’s subscription form in the landing page. It’ll also show you a working preview. (click, View Working Preview…). Use as-is, or adjust to taste.

You can see this being used on our own website (as of this writing – we may redesign soon!) – go to: https://dadamailproject.com/ and click on the image labeled, Subscribe and Receive Dada Mail News and Updates.

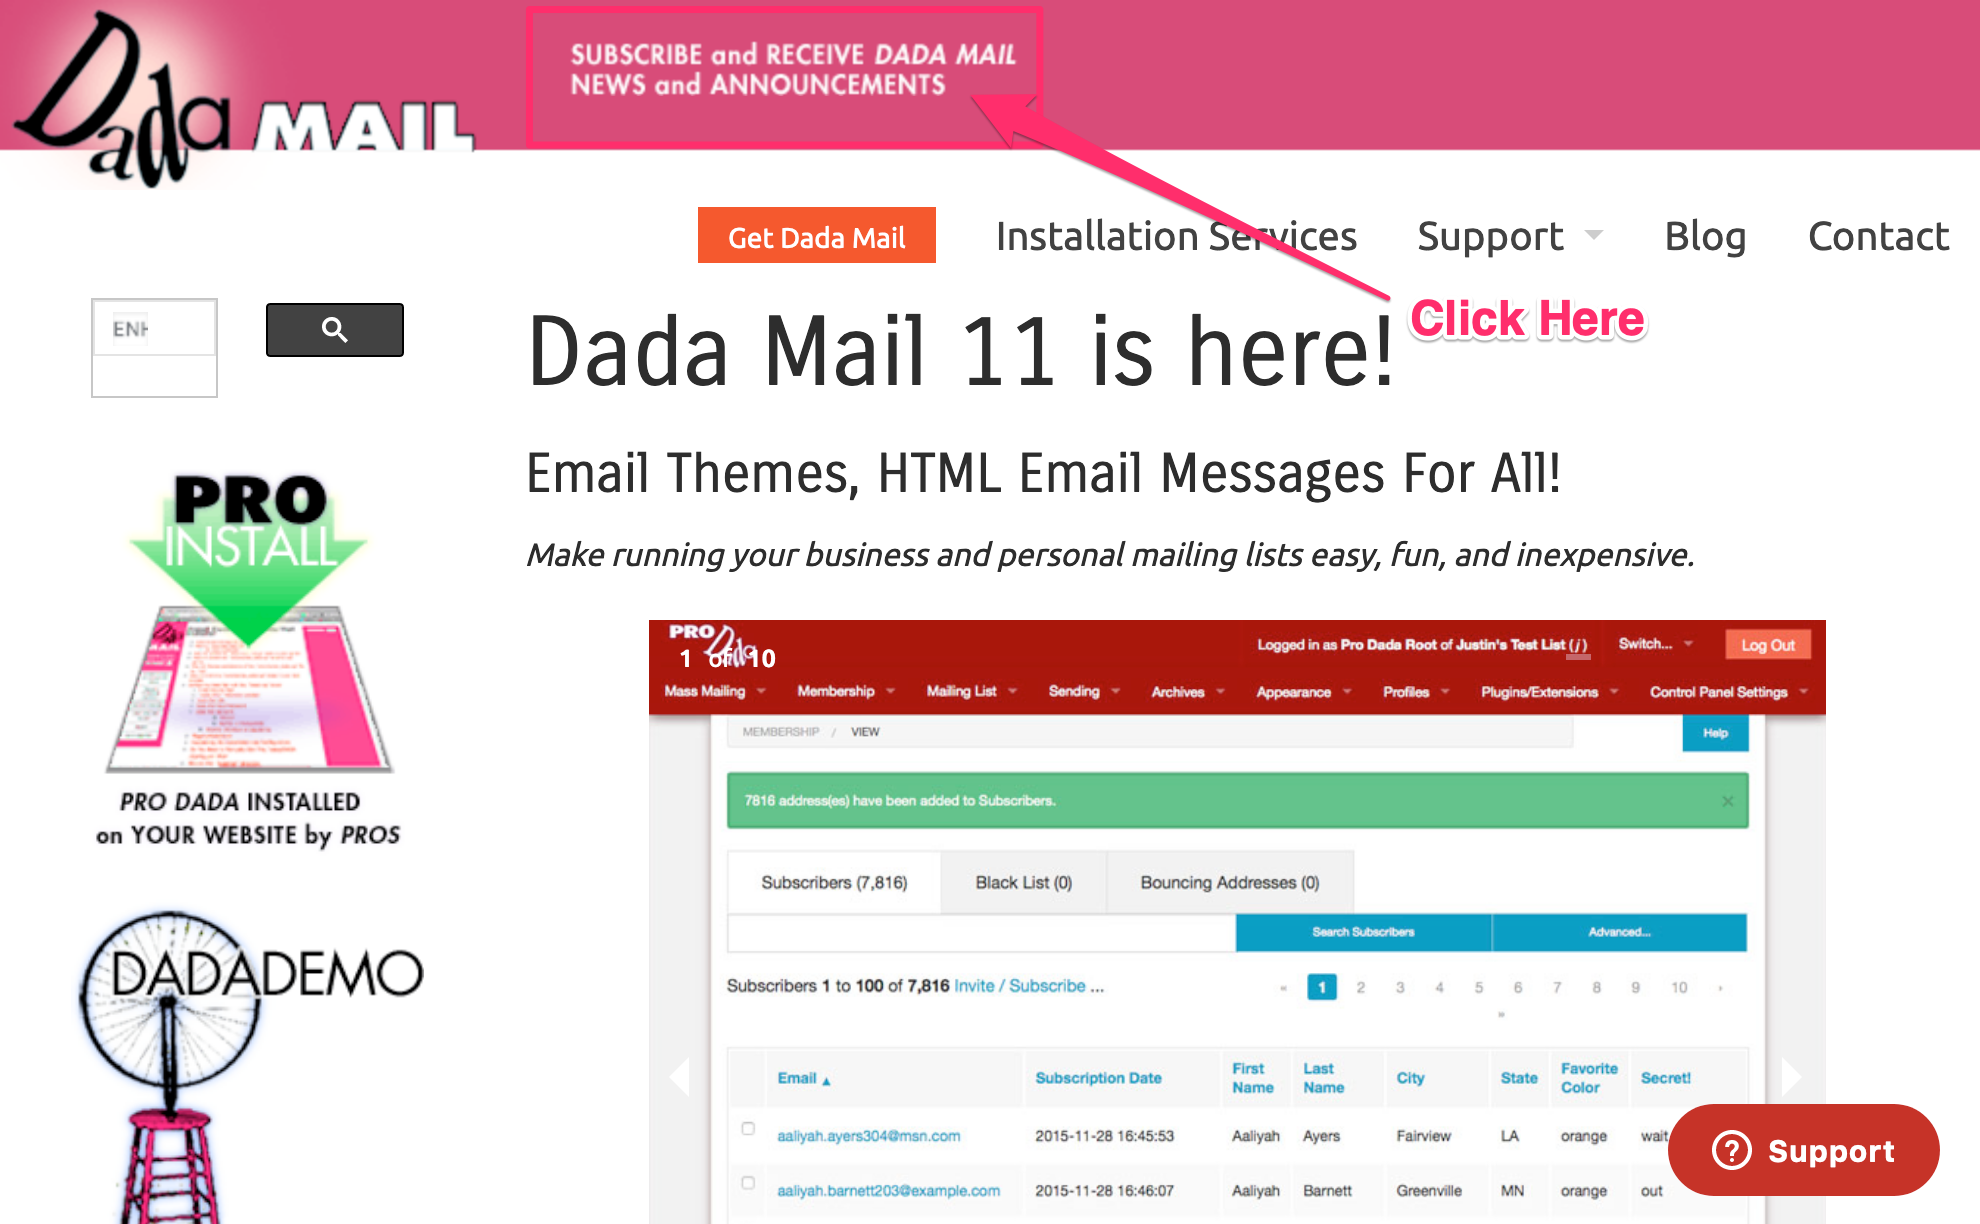
When you do, the modal window provided by lity will pop up, with the subscription form created by Dada Mail!

But of course, you can use this landing page however you’d like. Let’s use a WordPress plugin, called WP Post Popup. Once installed and activated, you can turn any link into a modal window. In this example, we just have to add the CSS class, “modal-link” into the link tag that’s pointed to our landing page URL:

<a href="https://dadamailproject.com/cgi-bin/dada/mail.cgi/modal_subscribe_landing/dada_announce/" class="modal-link" >
    Here's an example
</a>

And here’s that HTML code working in our own WordPress blog:

Here’s the working example.


And that’s all there is to it! Of course there are other plugins that may do more sophisticated jobs, but may need a bit more setup to do so. We encourage you to see what plugin options are there for you to take advantage of.


v11.11.x Features: Scheduled Mailings Enhancements

Dada Mail v11.11.x is packed with new features. In this blog post, we’re going to look at the enhancements to scheduled mailings.

Scheduled Mailings allows you to author a mass mailing to be sent out at a later date – either as a one-time mass mailing, or a mass mailing that’s repeated on a ongoing schedule.

There’s a few ways you can create a scheduled mass mailing, including turning any draft message into a scheduled mass mailing. When your authoring your draft message, look for the button on the top of the screen labeled, Save as: Schedule.

You can also create a Schedule Mailing from anew. Under, Mass Mailing All Drafts/Stationery/Schedules, click on the tab labeled, Schedules, then click on the button labeled, + New Schedule,

Whichever way you create a scheduled mailing, the scheduled mailing authoring screen looks a lot like the screen to create and then send a draft message, except for the additional options above:

In this blog post, we’re going to talk about the last three (new!) options and what they do.

Test Mode: only send a schedule mailing to test recipients

Dada Mail already allows you to test a scheduled message – just click the button on top labeled, Send Test,

A test mass mailing message will be sent out immediately.

This new option, when enabled, does something a little different. Instead of sending a test message right away, the scheduled mailing will only go to test recipients when the schedule itself is set to go out, thereby allowing you to make sure the scheduling is working, and not just test to see if a message can be sent out/looks good in your mail reader.

So, if you’re schedule is set to be sent next Wednesday, that’s when your test recipients – and not your mailing list subscribers, will receive the scheduled mailing. This can be useful to make sure that (for example), your recurring schedule is firing off correctly. One reason a schedule is not being fired off correctly is if the cronjob for Dada Mail has not been set, and that’s the first thing I would do when debugging a problem like this.

Test recipients can be set in the authoring screen. Click the, Options tab, then the, Testing tab. Dada Mail should give you the option to either list addresses you would like send a test message, or to use the Testers sublist, the latter of which can be reused for multiple drafts/schedules.

Curious about the different ways to send a test message? See our blog post about Test recipients: New in v11.5.0: Send Test Mass Mailings to Multiple Recipients.

Send email notification to List Owner when the scheduled mailing goes out

When enabled, this option tells Dada Mail to send a notification email directly to the email stating, “Hey! That scheduled mass mailing you set up? It’s sending!“. This can help confirm that everything is running properly. Here’s what that email looks like,

Send email notification to List Owner if a problem occurs

Just like the, “success” email notification, this option will send out an email notification if a scheduled mass mailing didn’t send out correctly. Hopefully, that email notification will also give clues as to why things didn’t get sent out. Here’s one example:

In this example, it’s the URL we’ve set to fetch the content of the HTML message (https://sdafkljsdflkjadsflkjasdlfkjalsdkfjlasdkjflkfdsj.com). It seems Dada Mail is having trouble fetching it (surprising, for sure!).

URLs in scheduled mass mailings can be useful, as the content fetched from the URL can change/be dynamic, so every time you send say, a recurring mass mailing, your message will also be unique. To build on that, Dada Mail can also send out a message based on an RSS feed, and also only if the content differs from the last message sent in the schedule.

See our blog post: Use Dada Mail to create a mass mailing from a blog feed, then send it on a recurring schedule, to see a walk through on how this works.

So that’s some of the new features found for scheduled mailings. In future blog posts, we’ll go over some other features that make their debut in v11.11.x of Dada Mail.