Segmentation And Mass Mailing in Dada Mail

Dada Mail has the ability to send to only part of your mailing list (Segmentation).

We’re going to start with a list set up with a few Profile Fields:

first_name, last_name, city, state, favorite_color, _secret

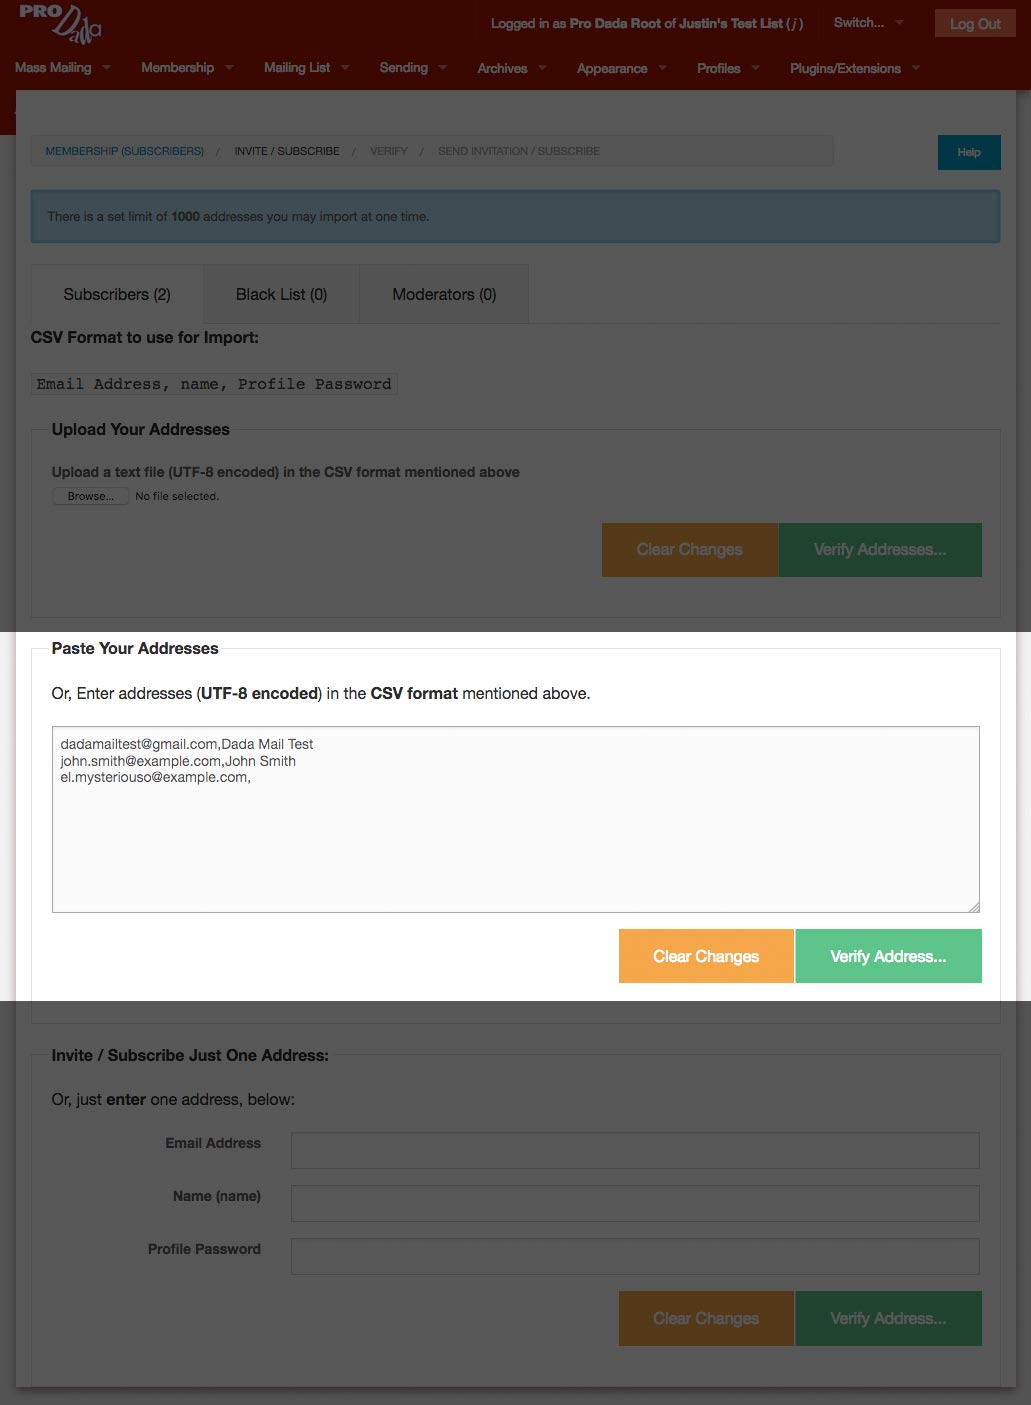
Here’s a sampling of the csv file I’m going to import into my own mailing list:

angelina.mcintyre376@yahoo.com,Angelina,Mcintyre,Vernon,NV,,that,IAMneoTj
alex.holt126@yahoo.com,Alex,Holt,Milton,ID,,watch,kDaCRtzm
isaiah.rodriguez161@blah,Isaiah,Rodriguez,Kingston,MT,yellow,day,TiepsAau
caroline.albert564@aol.com,Caroline,Albert,Ashland,DC,,place,nkg5PhuY
angelina.hudson750@gmail.com,Angelina,Hudson,Salem,WA,,house,wfHs5ZaC
payton.mcguire914@msn.com,Payton,Mcguire,Riverside,NV,,more,ZpxOkY2f
lucas.barnes666@pobox.com,Lucas,Barnes,Mount,WI,,this,4CQ3wQ97
ariana.conley204@blah,Ariana,Conley,Marion,NV,violet,well,UJquFGAF
madelyn.hale435@hotmail.com,Madelyn,Hale,Milford,MS,,year,bkJjbY3R
aidan.woodard52@blah,Aidan,Woodard,Washington,AL,,stop,8JeipYPC

The first column is the actual email address of my subscriber; the last is the profile password of the address. The column named, _secret won’t show up in my subscription form, as it begins with an underscore. This data is correctly formatted to be easily imported into my list.

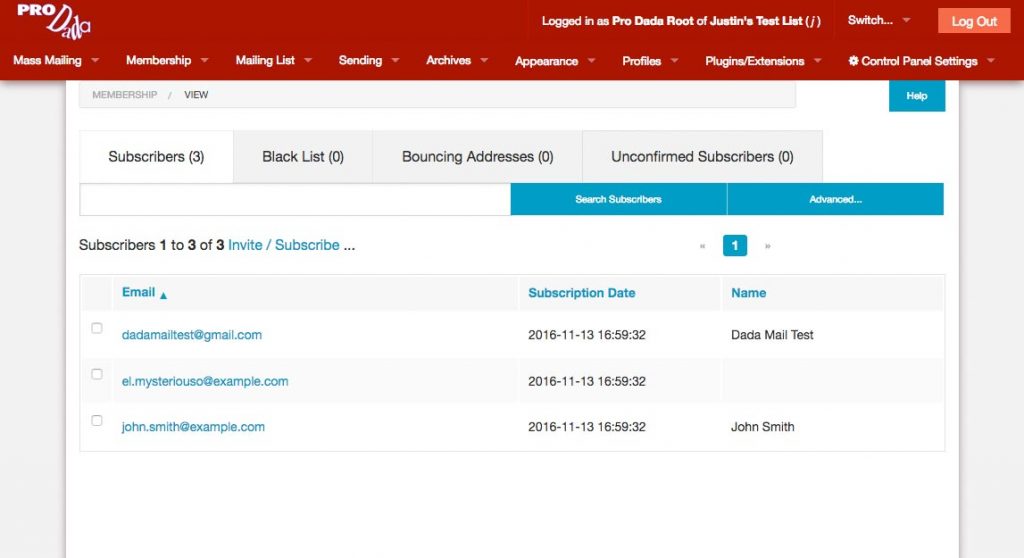
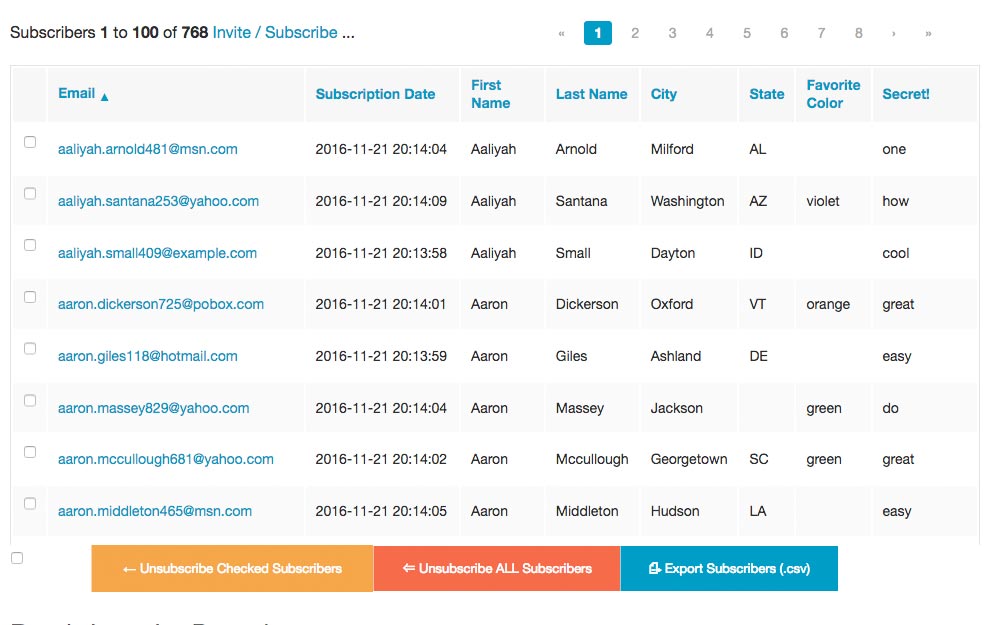
Here’s how my subscribers look, once I do import it into my mailing list and viewed in Membership: View:

segmentation

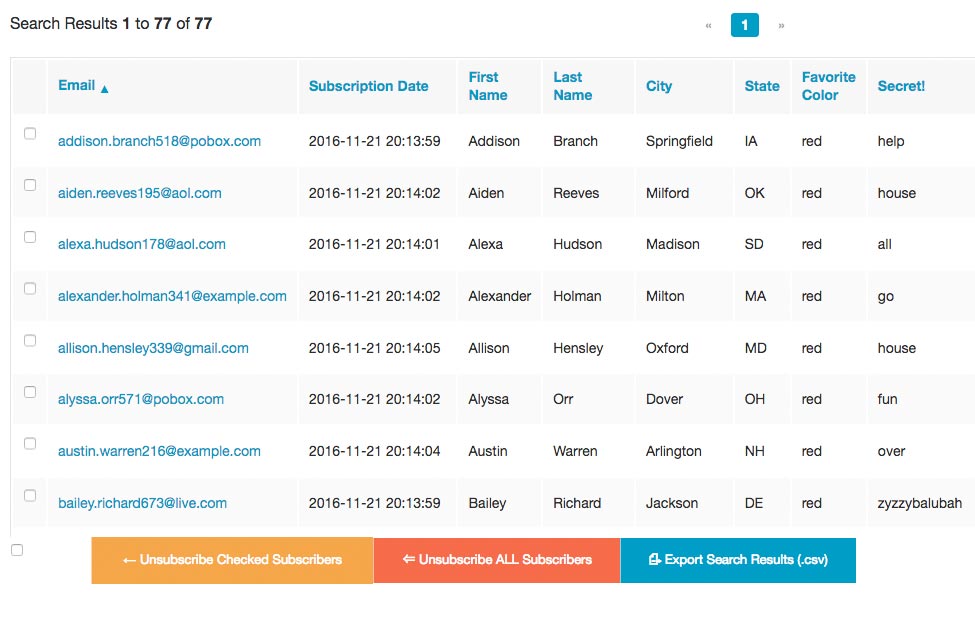
This screen also allows me to do an advanced search across all my subscribers. I’m going to search and see which subscribers have, favorite_color set to, red. My results will be shown below this search form:

segmentation2

So that’s how advanced search works in the Membership: View screen. How would I search for subscribers to send a mass mailing to?

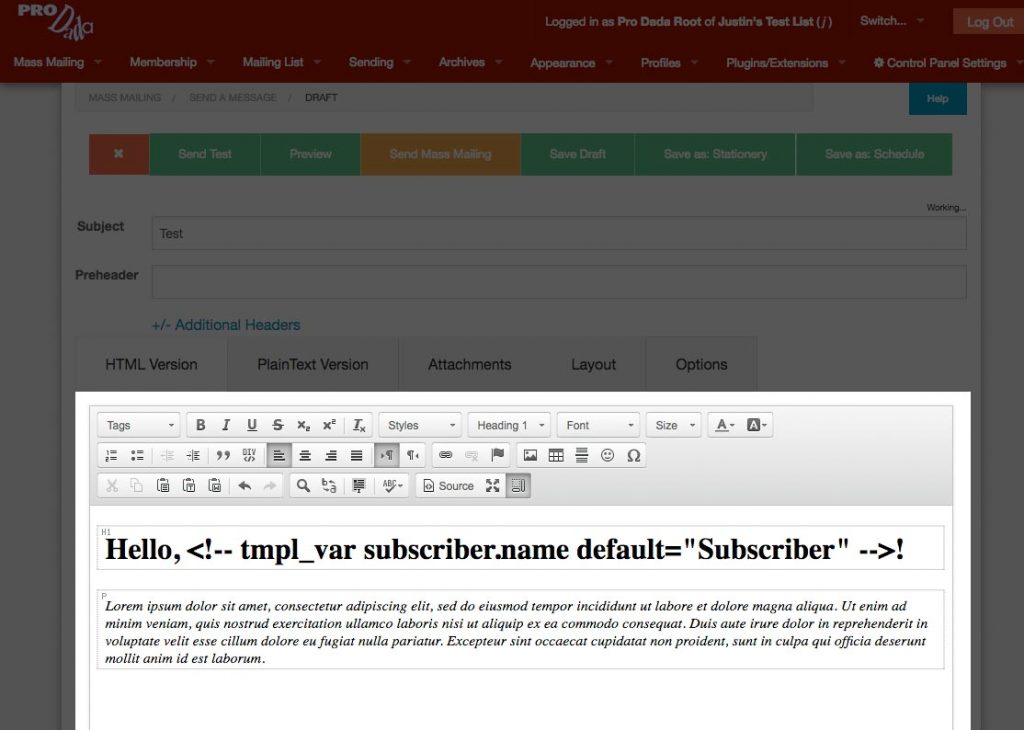
Let’s go into the Mass Mailing: Send a Message screen. Once on that screen, click the Options tab, then click the, Partial Mailing List Sending tab within the Options tab. You’ll be greeted with a search form that looks similar to the advanced search form in Membership: View screen:

segmentation3

Just like we did in the Membership: View screen, we’re going to search for subscribers with a favorite_color of, red. Click the, “Preview…” button to get a preview of the subscribers we’ve found:

segmentation4

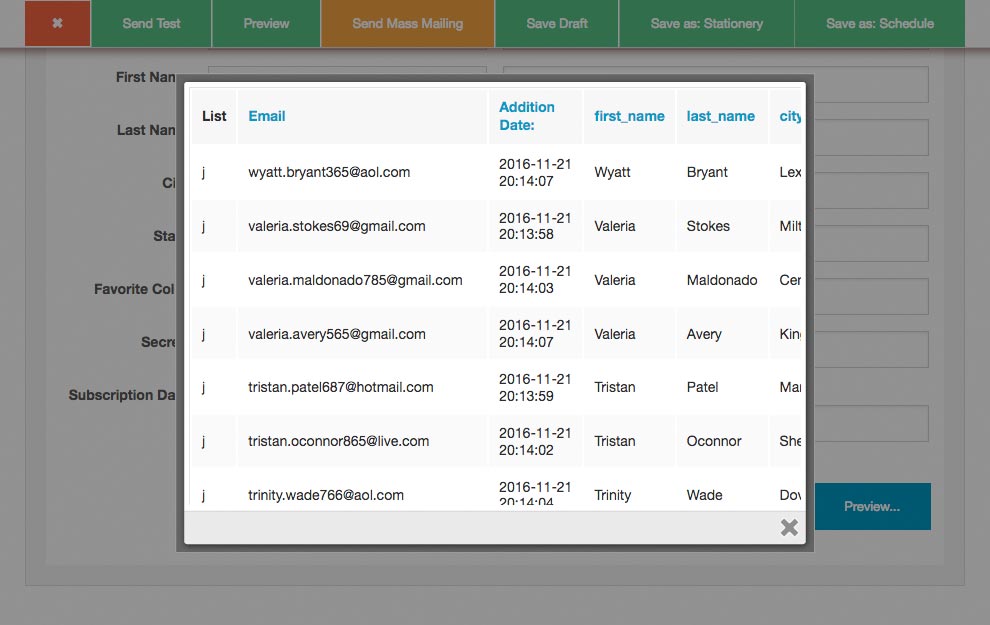
Now, when we send out our mass mailing, only the subscribers listed in these results will receive your message.

That’s how easy it is to segment out your mailing list!

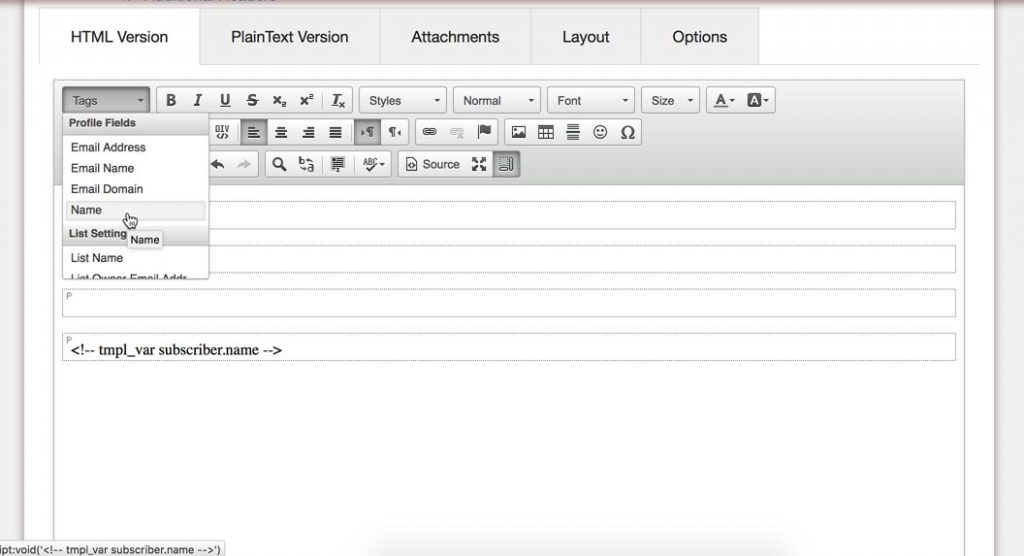
Dada Mail also allows you to have different content in your mailing list, depending on the value in each address’s profile fields. For our, favorite_color example, we can use the following snippet of HTML and Dada Mail’s template tags to only show this message to subscribers with favorite_color set to, red:

<!-- tmpl_if expr="(subscriber.favorite_color eq 'red')" -->

<h1>Red Lovers, A Deal You Cannot Pass Up:</h1> 

<p>
Lorem ipsum dolor sit amet, consectetur adipiscing elit, 
sed do eiusmod tempor incididunt ut labore et dolore magna aliqua.
</p>

<!-- /tmpl_if -->

The magic is in this line:

<!-- tmpl_if expr="(subscriber.favorite_color eq 'red')" -->

This way, you can send to your entire list, but have messages custom for practically every subscriber you send to.

Dada Mail’s templating system follows the rules documented here, which should give you a good idea on what it’s capable of.

Experiment with these two advanced features, and let us know how they’re working for you!


How to turn any Dada Mail install into a Pro Dada install

Pro Dada is a distribution of Dada Mail that is shipped without any mailing list, or subscriber quotas, as well as direct email support available. It’s our commercial offering of Pro Dada, and what funds further development of the app. Here’s more about Pro Dada

Many people start with Dada Mail (in fact, we suggest to try Dada Mail first, to make sure it’s what you’re looking for, and that Dada Mail is compatible with your server setup!), then want to upgrade to Pro Dada. But, the idea of upgrading to Pro Dada isn’t always attractive, as it may mean more work, or flubbing up the current, perfectly working configuration. Luckily, this isn’t something you need to worry about, as Dada Mail has the ability to be, “transformed” to a Pro Dada installation easily. Here’s how to do that:

Log into one of your mailing lists, using the Dada Mail Root Password. On the top bar menu, look for a big red button labeled, “Transform This Install Into Pro Dada“:

transform

Click that button! You’ll be directed to a screen that will ask you for you to submit Pro Dada username and password, which are provided to you, once you’ve purchased a Pro Dada subscription:


transform1

Click the Verify… button, and when your login credentials have verified, you’ll be presented with a single button to transform your install. Click that button,

transform2

and you’re done!


How to Send Personalized Emails with Dada Mail

Dada Mail fully supports sending personalized mass email messages to your entire maling list, or just a segment of your mailing list. Let’s go through how to set this all up!

Profile Fields

By default, Dada Mail only captures and stores a subscriber’s email address, but we can add additional fields to capture and save in the List Control Panel. Log into your mailing list (use your Dada Mail Root Password!), and navigate to, Profiles: Profile Fields. In this walk through, we’re just going to make one field called, Name. I’ll then show you how to create a salutation in your message.

Here’s the Profiles: Profile Fields screen, with our new field filled out,

profiles_add_new

Field Name is the internal name used when working with profile fields, and has few constraints on what you can use. In this example, I’ll be using, name.

Label is what you’ll see on things like the subscription form, and is much more free-form. In this example, I’ll be using, Name (notice the capitalization!)

Fallback Value can hold a value used, if there isn’t a value for the subscriber, for this profile field. We’re not going to use it here, but I’ll show you how to add a default value, when using this in our actual message.

Finally, there’s a checkbox to tick, if you would like this field to be required.

Adding Subscribers w/Profile Fields

OK, now that our field is created, let’s add a few subscribers to our mailing list.

I’m going to navigate to the Membership: Invite/Subscribe/Add screen. This screen allows you to subscribe new members one at a time, and en-mass. We’re going to add three at a time in this demo, by adding a CSV (Comma Seperated Value) file. Here’s what that file looks like:

dadamailtest@gmail.com,Dada Mail Test
john.smith@example.com,John Smith
el.mysteriouso@example.com,

I created this file in a spreadsheet, then just exported the data as a .csv file. Our first two subscribers have both an email address and name, and our third subscriber, el.mysteriouso@example.com doesn’t have a name at all.

profiles_add_new2

After pasting the content of my .csv file (you can also just upload the file itself), I’ll click, Verify Addresses…, which goes through the black magic of making sure the data I’m submitting is valid, that these addresses aren’t already subscribed, etc. Once done with the entire process, I can see all my subscribers, in the Membership: View screen,

profiles_add_new3

You’ll see our new, “Name” field in the last column of the table of subscribers. Great! Now that we can capture and save new fields, let’s use them!

Sending out a Personalized Message

We’re now going to go to the Mass Mailing: Send a Message screen, and write a new message. Now that we have the Name field, let’s use it to add a simple salutation up front – “Hello, ” and then the name of my subscriber. How do we do that?

Enter template tags.

Template tags allow you to put placeholders into your message that will then be replaced with the value that they represent. In Dada Mail, a template tag to represent our, Name field will look like this,

<!-- tmpl_var subscriber.name -->

(Notice we’re using the Field Name, and not its Label!) So, to make that salutation we would like to create, we just have to write,

Hello, <!-- tmpl_var subscriber.name -->!

And that’s all there is to it. What about our subscribers, like el.mysteriouso@example.com that are nameless? We can add a default value to our template tag, to let Dada Mail know what to write, if there isn’t a name. Here’s what that looks like,

Hello, <!-- tmpl_var subscriber.name default="Subscriber" -->

In our example above, if there’s no name saved for an address, “Subscriber” will be written instead. Here’s how it all looks, when writing my message:

profiles_add_new4

Let’s see what this looks like, when we send our message out. Checking my test account, dadamailtest@gmail.com:

profiles_add_new5

And that’s all there is too using template tags!

Many other template tags are available to you, and a collection of them can be easily inserted via the rich text editor. Look on the rich text toolbar for a popup menu labeled, Tags. Clicking this popup menu will reveal some of the tags available. Selecting a tag will insert that tag into your message:

profiles_add_new6

Delving Deeper

We’ve only touched upon Dada Mail’s features for Profile Fields, Personalized Email Messages, and Email Template Tags. Check out the doc links, as well as the Pro Dada Manual, which comes with a Pro Dada Subscription.