Howdy everyone. We’ve refreshed the forum software used at https://forum.dadamailproject.com to help the community ask, and answer questions about Dada Mail. Enjoy!
v11.6.0 Released: new features to look out for
v11.6.0 is out the door, and with it are some welcome changes. Most of the changes of v11.6.0 are on the backend of the app, and most likely won’t be noticeable to a casual user. Plow into the actual changelog to see what those are.
Here are some things to look out for on the frontend:
Global Unsubscribe + Global Black List Safeguards
Dada Mail has a global setting called, Global Unsubscribe, which allows you to unsubscribe an email address from all your mailing lists, when you unsubscribe an email address from any of your mailing lists. It’s a powerful feature! Dada Mail also has the ability to remove all your Subscribers with the push of a single button:
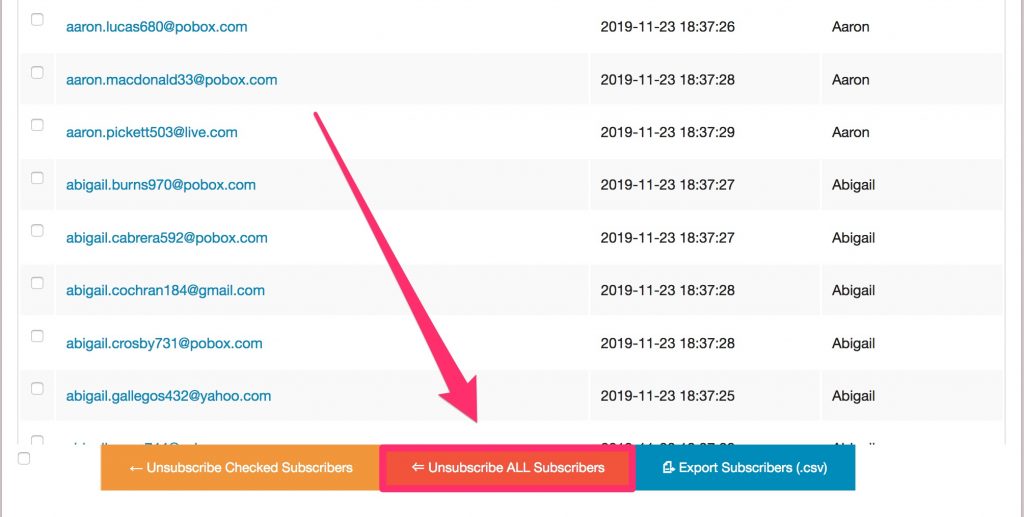
This button is problematic, if Global Unsubscribe is enabled, since not only will Dada Mail unsubscribe everyone from your mailing list, it may in fact unsubscribe everyone for every mailing list.
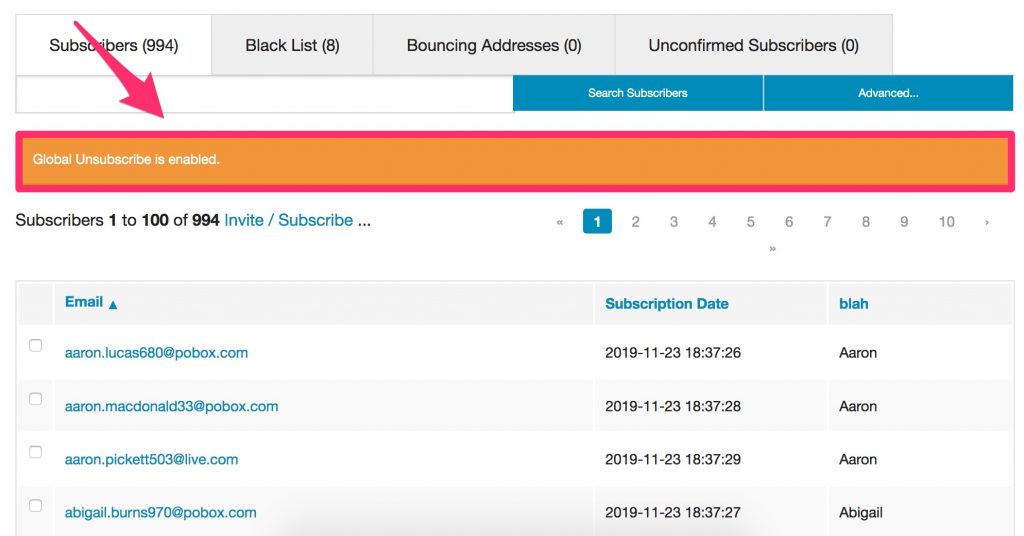
We’re not going to remove this ability – it may be something you rely upon, but we are going to put some safeguards in. First, we’ve put an alert box on top just to remind you that Global Unsubscribe is a Thing:
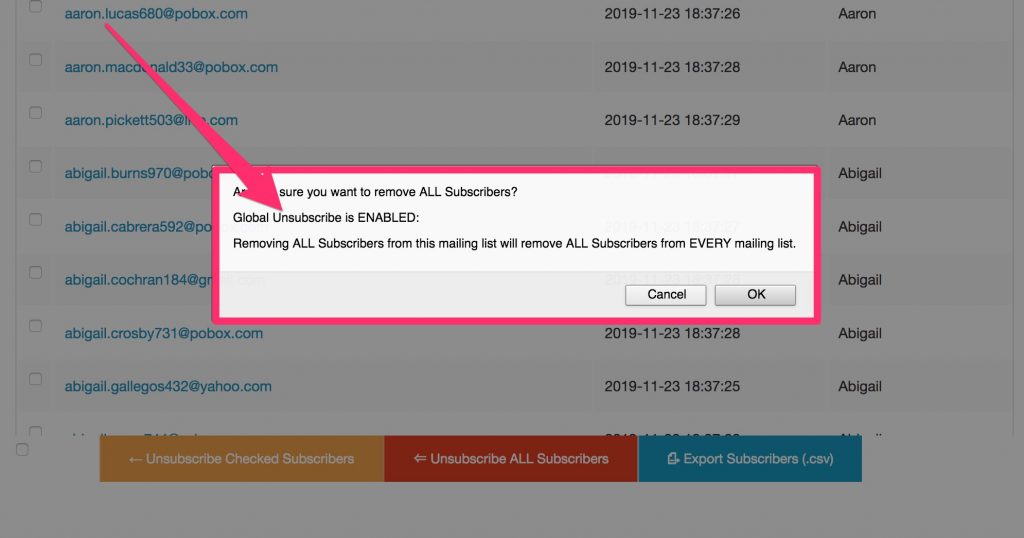
If you try to use the “Unsubscribe All” button, the alert box that pops up will also remind you that Global Unsubscribe is enabled:
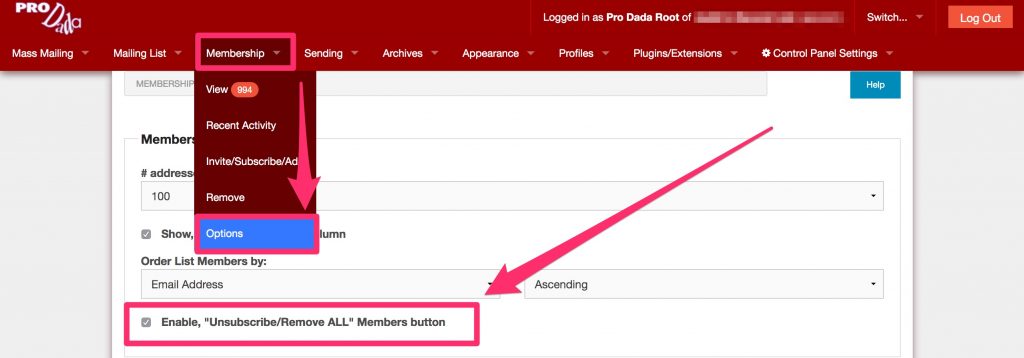
This button itself is also disabled. You may enable it in the Membership: Options screen. Look for the checkbox labeled, Enable, “Unsubscribe/Remove ALL” Members button:
Hopefully, this will help stop inadvertently causing chaos to your mailing lists! Similar situation when the Global Black List is enabled: button to remove all Blacklisted is disabled, alert box will mention this feature being activated, and there is an alert box reminding you at the top of the table that shows your Black List.
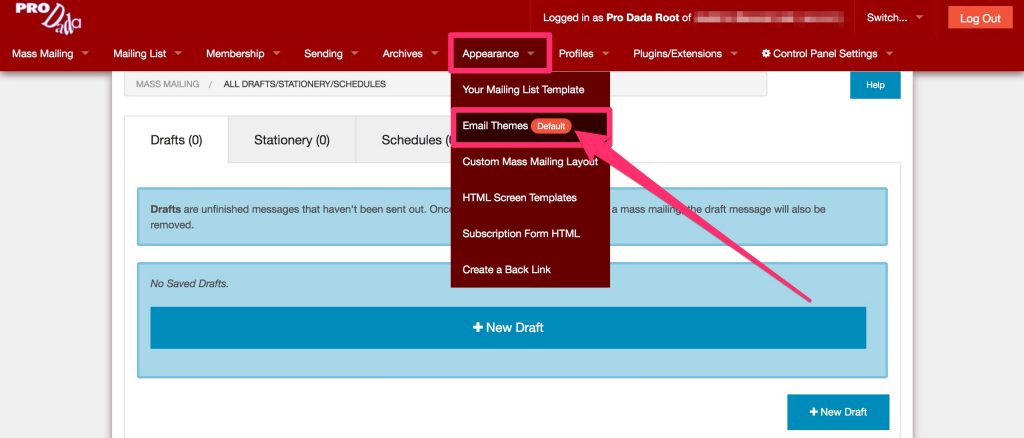
Other things to look out for: the admin menu now lists which theme you have enabled, right on the menu:
Want Whatsapp support? You’ve now got WhatsApp support. Your Whatsapp number will appear in the footer of your mailing list email messages. Set it under, Mailing List: List Information:

v11.5.1 Bug Fixes and Welcome Changes
v11.5.1 is mostly a bug fix release – we suggest anyone running a previous version of Dada Mail to upgrade (as always). See the changelog for all details for this release. If you need an upgrade, we’re here for you.
In this post, we’re going to look at a few changes that you may welcome:
Cleanup of backup file/directories
During an upgrade, Dada Mail’s installer makes backups of some of the directories it finds in the, dada_file_support_files directory. If you’ve been running Dada Mail for a while, and have been on top of upgrading, this directory can get filled with more backups than you’d know what to do with. So many, that it can be a pain to have to manually remove the unneeded backups.
Here’s an example:
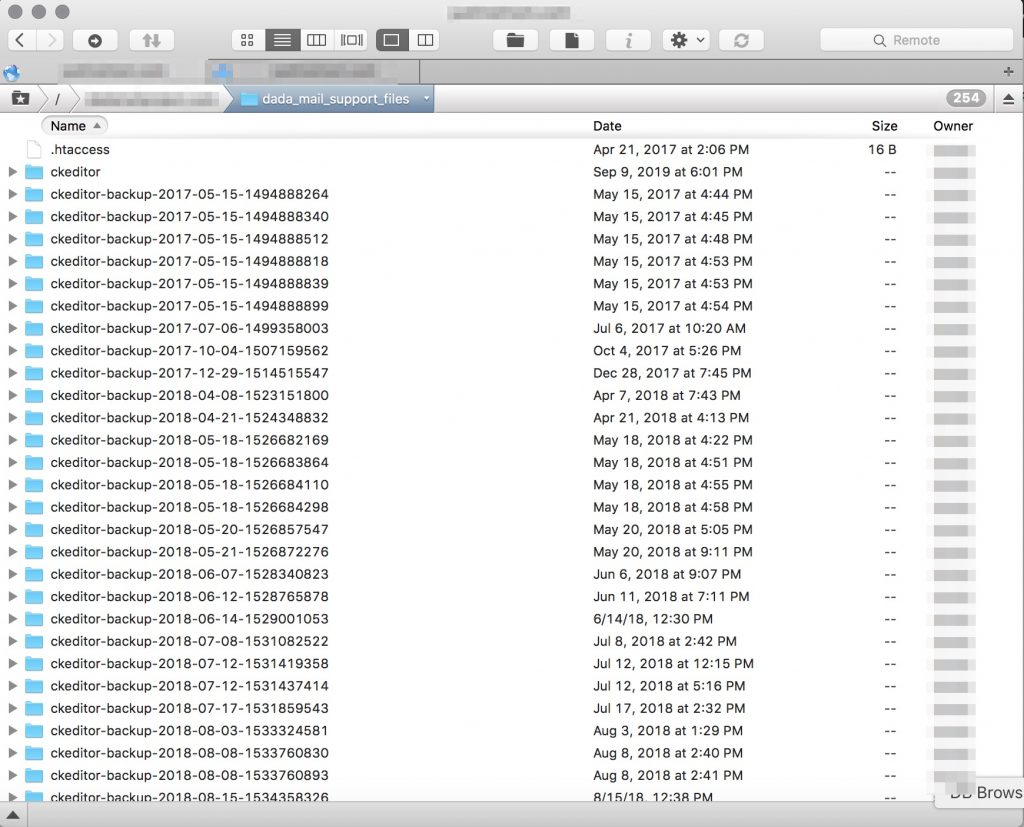
This screenshot looks into the dada_files_support_files directory via an FTP client, showing 30+ backups of the, “ckeditor” directory! Not good. If we run a du -h on the directory, we’ll find out that all these files take quite a bit of space:
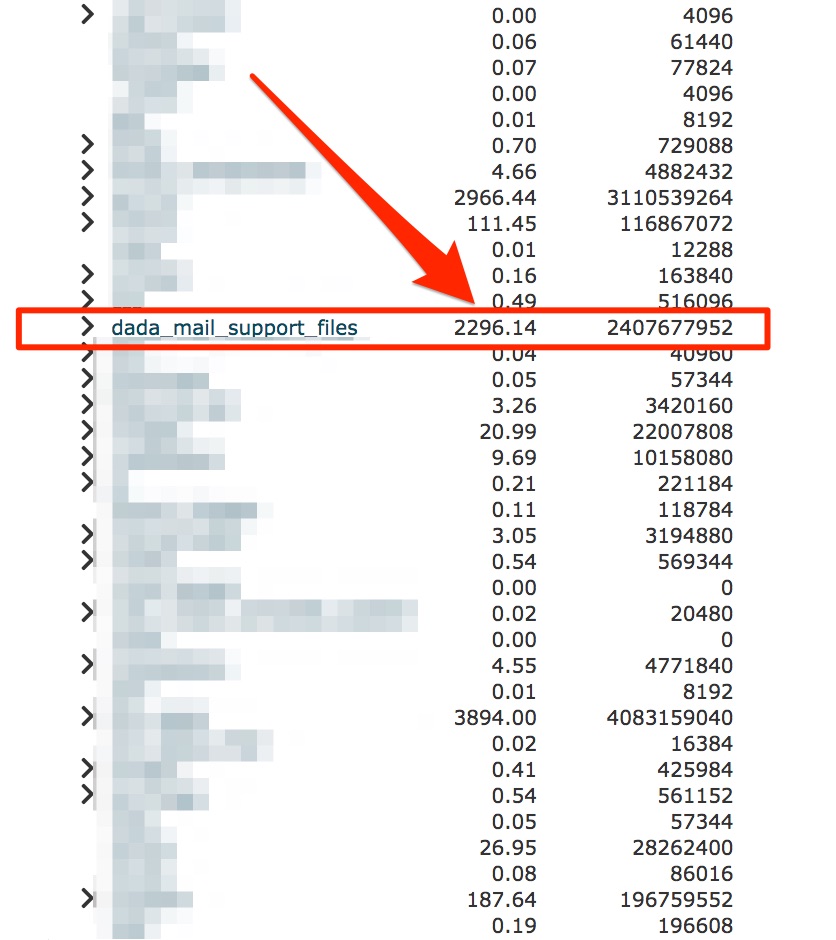
Yikes: about 2 gigs of wasted disk space.
Now, when you upgrade with Dada Mail v11.5.1, only the last 3 backups will be kept, the rest will be removed. Here’s the dada_mail_support_files directory after the upgrade to v11.5.1:

Much cleaner!
And the disk space is down, too:

By about 90%!
Second cool thing to look for are for those running discussion lists that utilize moderation. We’ve made it a little easier to find the list of messages awaiting moderation. Under Plugins/Extensions: Bridge, look for the settings that deal with Moderation. A new button should be visible that allows you to see all the messages that are awaiting moderation:

Clicking this button will bring you to the listing of awaiting messages:
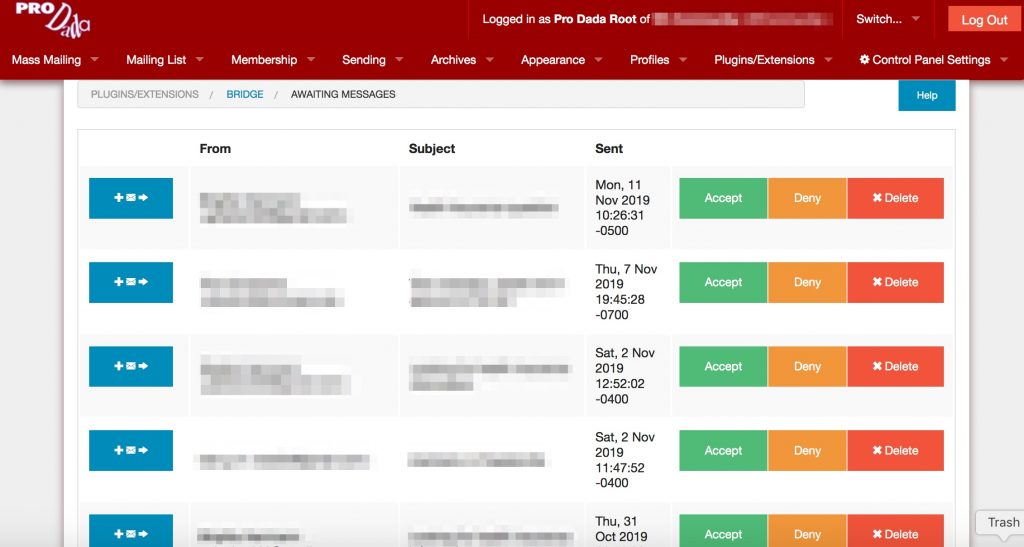
Each row in the able will show the message From and subject, as well as when the message was sent. Four buttons are available, allowing you to approve, deny, delete, or even resend the moderation message to the moderators.
Setting up a private notification system with Dada Mail
We recently started offering Lifetime upgrade overage to our install/upgrade options, complementing the one-time, and yearly upgrades. We also give people the choice on if they would like us to upgrade them whenever a new release is put out, instead of having them request an upgrade from us. This can save us both time.
But, we don’t want these upgrades to come as a huge surprise, and we don’t want to stop communicating with our clients. So, we decided to set up a simple upgrade notification mailing list for our paid clients, and of course: we used Dada Mail to allow us to set everything up within minutes. Here’s how we did it:
Continue reading…New in v11.5.0: Send Test Mass Mailings to Multiple Recipients
Test sending out your mass mailing is a great idea to do, before you commit to sending out the message to your entire mailing list.
In past versions, Dada Mail could only send only send a test mass mailing to one email address at one time.
Starting with v11.5.0, Dada Mail can send a test mass mailing to multiple addresses at once.
By default, this list of test recipients can be created per draft message by typing in the email addresses in the same text box that previously only supported one email address. By default, up to ten email addresses may be added to this text box, and sent a test mass mailing.
Additionally, a Testers List may be enabled so that the same list of addresses can be sent a test mass mailing for all draft messages. This sublist can be administrated simnilarly to your main Subscribers list.
Here’s where to find all these new enhancements:
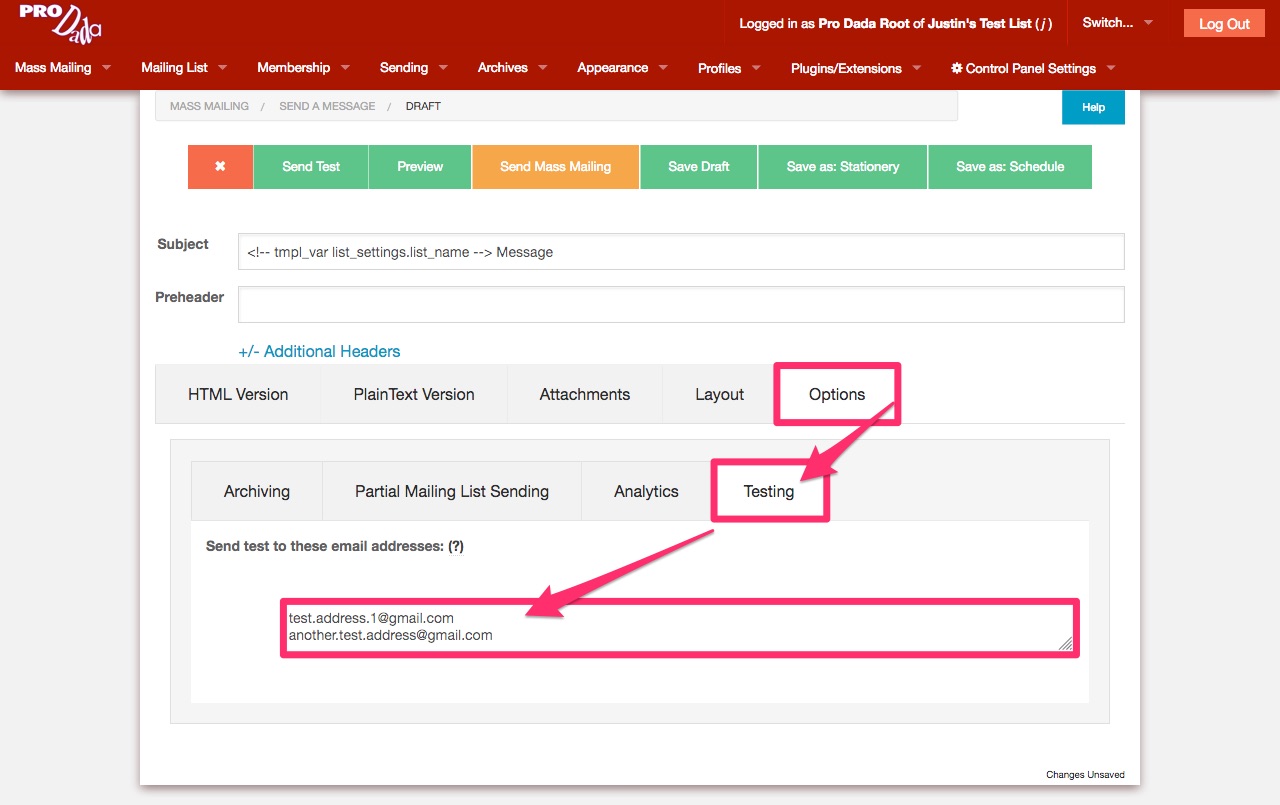
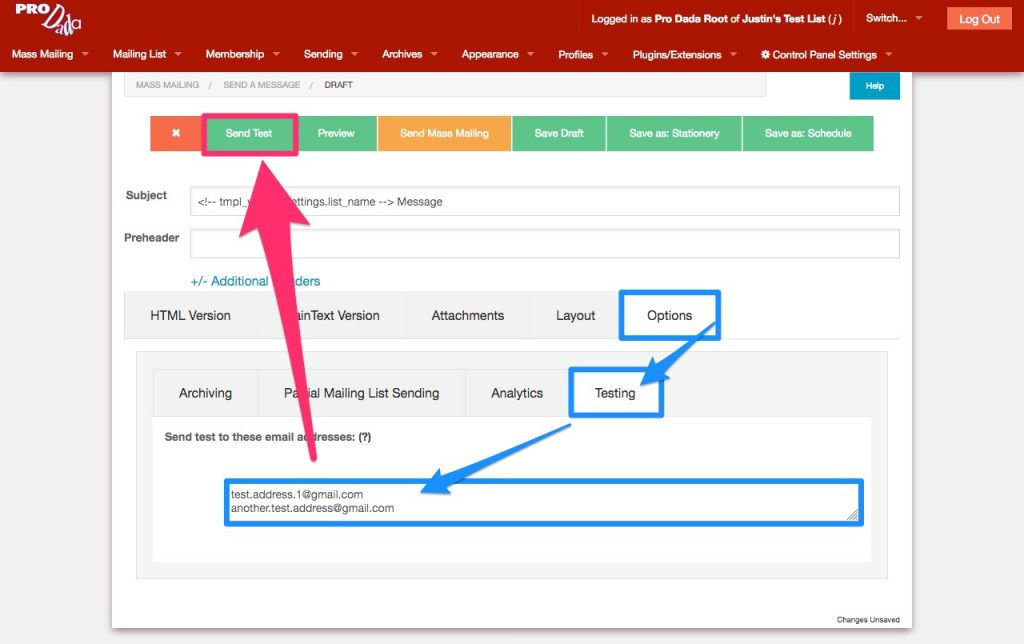
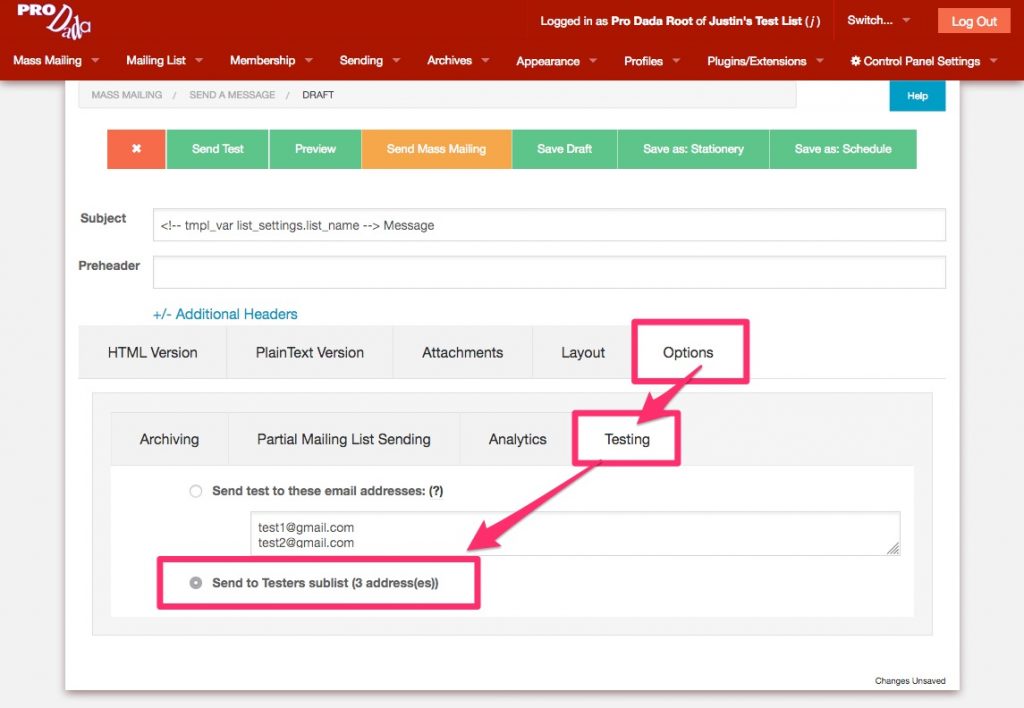
When drafting a new mass mailing, click on the, Options tab, then click on the, Testing tab. This is where you’ll find the text box to list the addresses you would like your test mass mailing to be sent to. By default, you can enter up to ten addresses (read on to find out how to change this default). Separate each address you enter in the text box by commas, spaces, and/or new lines.
When you’re ready to send out a test mass mailing, click the button at the top of the screen labeled, Send Test.
The screen will refresh to show you the mass mailing monitor for your test mass mailing. A button will be shown at the top of the screen labeled, Return to Editing Draft.
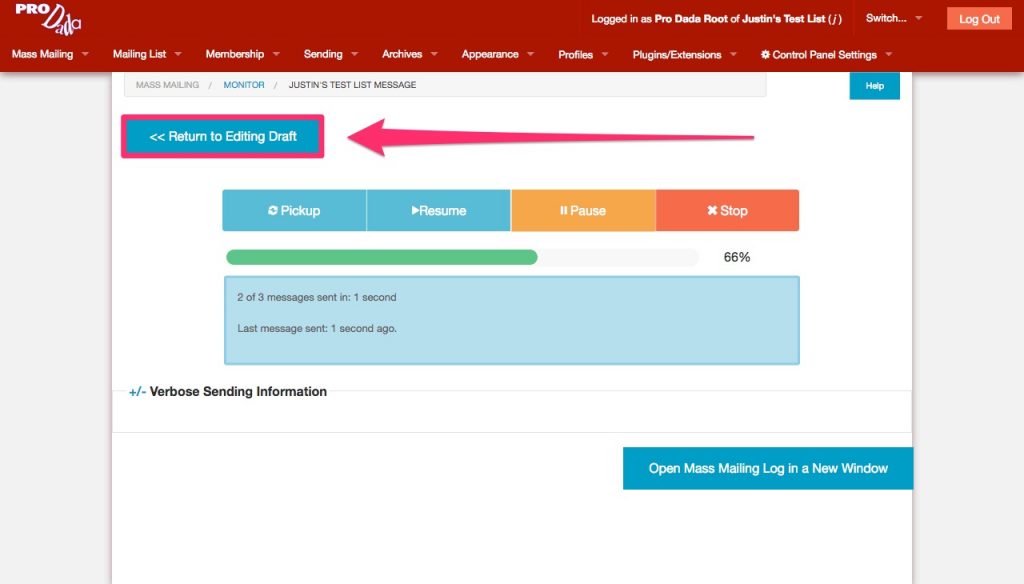
Click this button to return to your draft message, so that you can continue editing the message, or to send the mass mailing out for real. (Note: In previous versions of Dada Mail, you would never leave the draft editing screen, as only one email address would be sent the test mass mailing.)
To enable the Testers List, go to Membership: Options in the list control panel. Find the section labeled, Testers List to see the options available to you. Check the option labeled, [x] Activate Testers List to enable the Testers List.
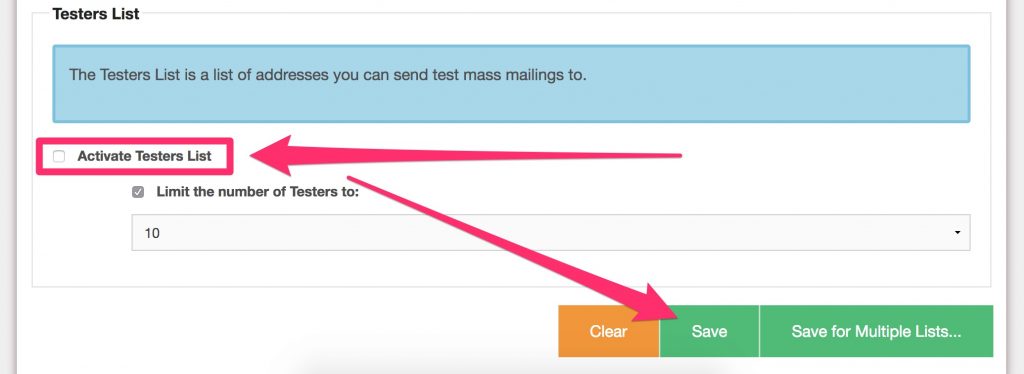
Options below this checkbox will allow you to specify if there’s a limit to how many addresses you may have in your Testers list as well as what that limit is. The limit set here will also affect how many addresses you can add to the text box in the drafts screen, per draft message.
Once enabled, the Testers list can be accessed in the list control panel under, Membership View. Click the tab labeled, “Testers” to see add/edit/remove addresses in this sublist.

And once enabled, you can toggle between using your Testers list and a unique list of addresses per draft message in the draft message itself. Revisit the Options: Testers tab(s) to now see the two options available. Select, Send to Testers sublist to send your test mass mailing to the Testers.
Sending a test message can be useful in a few different ways. With a test mass mailing, you can make sure that delivery is working to specific addresses, domains, and email services, and that the email message itself is displaying correctly on a spectrum of services and devices. This can also help you get a checkoff of the content an design of your mass mailing if you’re working within a team.
There are a few things that happen differently when sending out a test mass mailing. To start, none of the recipients of a test mass mailing will be able to unsubscribe through the test mass mailing. Also, test mass mailings will not be tracked for things like Opens, Clickthroughs, or Bounces.