v10.5.0 of Dada Mail comes with a new file browser/uploader, called Rich Filemanager! This tool allows you to select files from your desktop computer, upload them to the server that Dada Mail is running on, and select the file to add as an inline image or as a file attachment for your mass mailing. Once the file has been uploaded, you may use it again for another mass mailing.
Adding an image to your mailing list message
Log into your Dada Mail list control panel, and go to the Send a Message screen.
Look in the toolbar of the rich text editor for the Image icon – it’s the icon with the simplified mountain and sun:
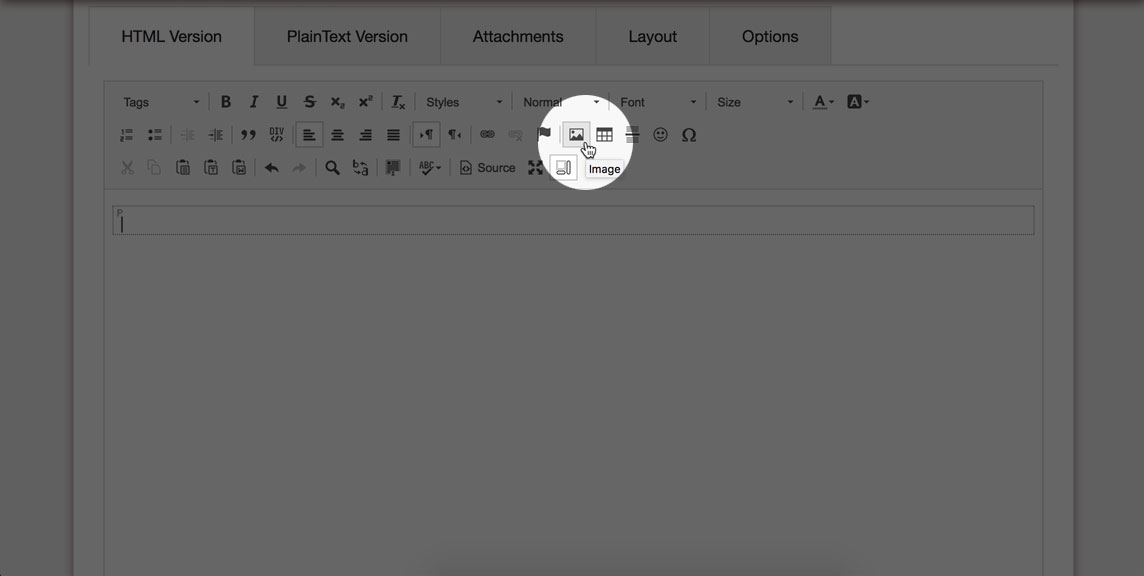
Click the Image icon – the below modal window will appear – click the button labeled, Browse Server
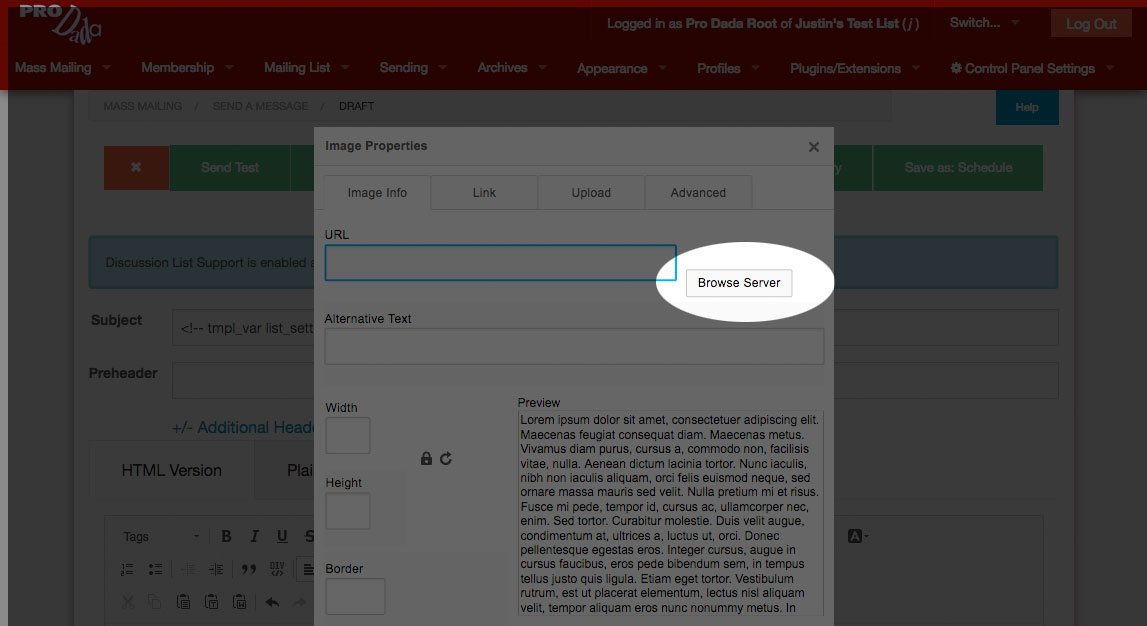
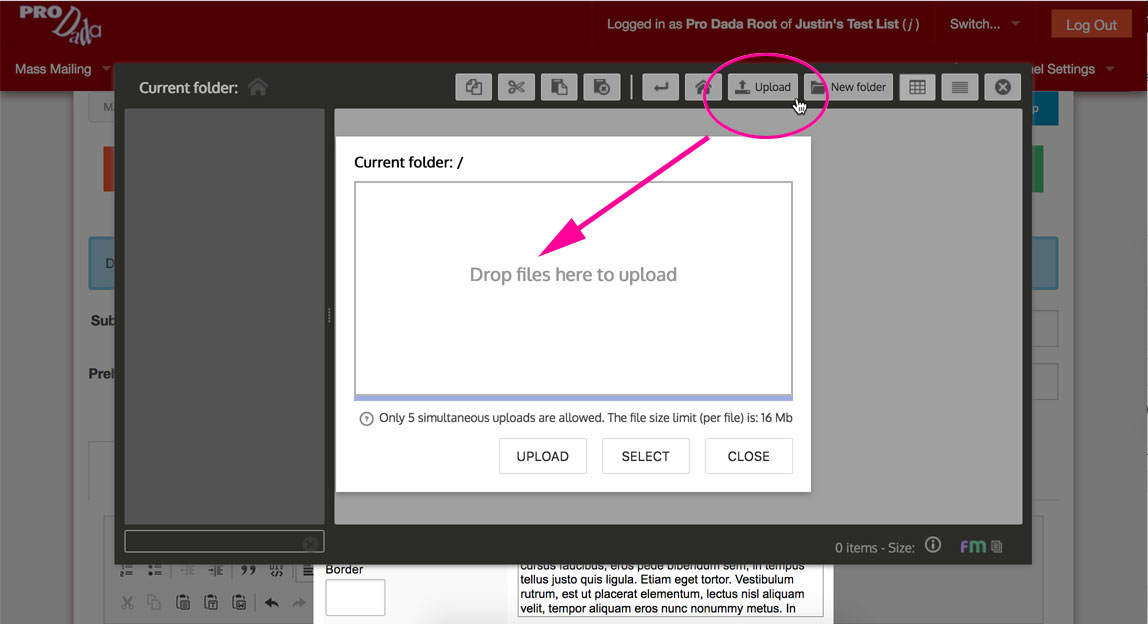
Another modal window will appear, showing Rich Filemanager! Let’s upload a image: click the button labeled, Upload.
A new area will be revealed. You may either drag/drop an image into this area, or click on this area to select a file on your local computer.
Once you’ve selected an image and it’s shown in this preview area, click the button labeled, Upload:
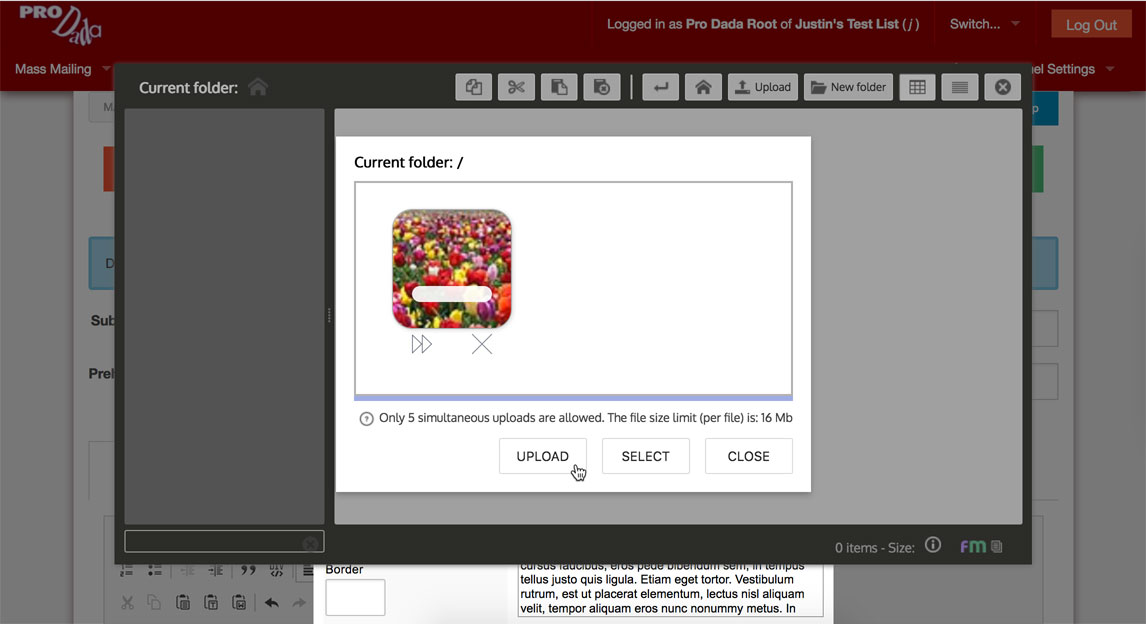
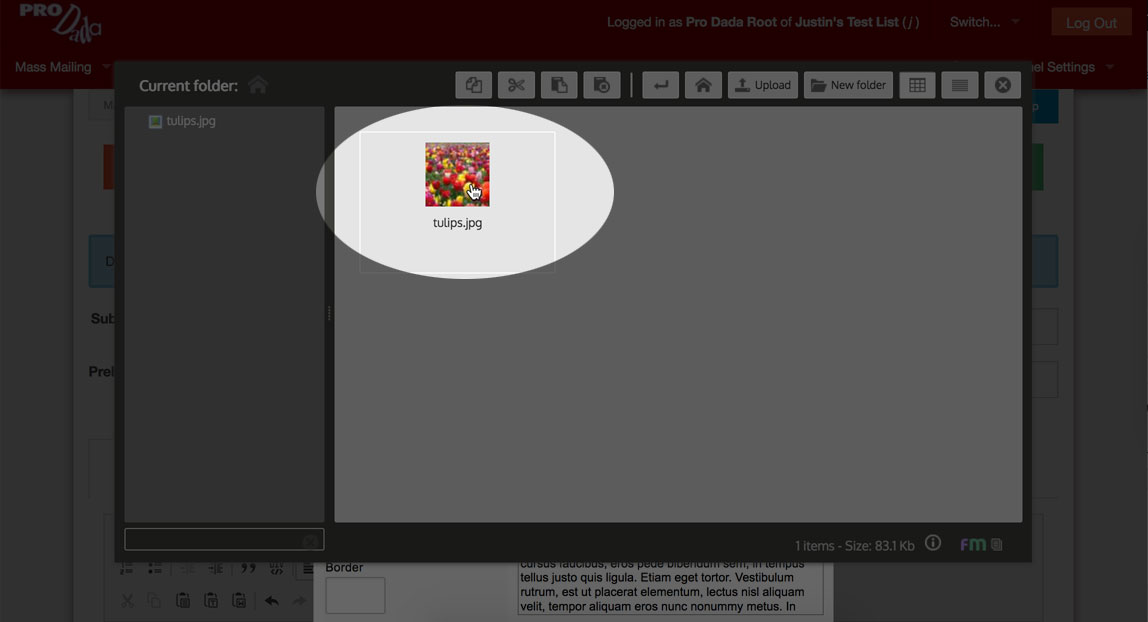
The image will be uploaded, and will now be shown in Rich Filemanager. Click on the thumbnail of the image to view a larger preview:
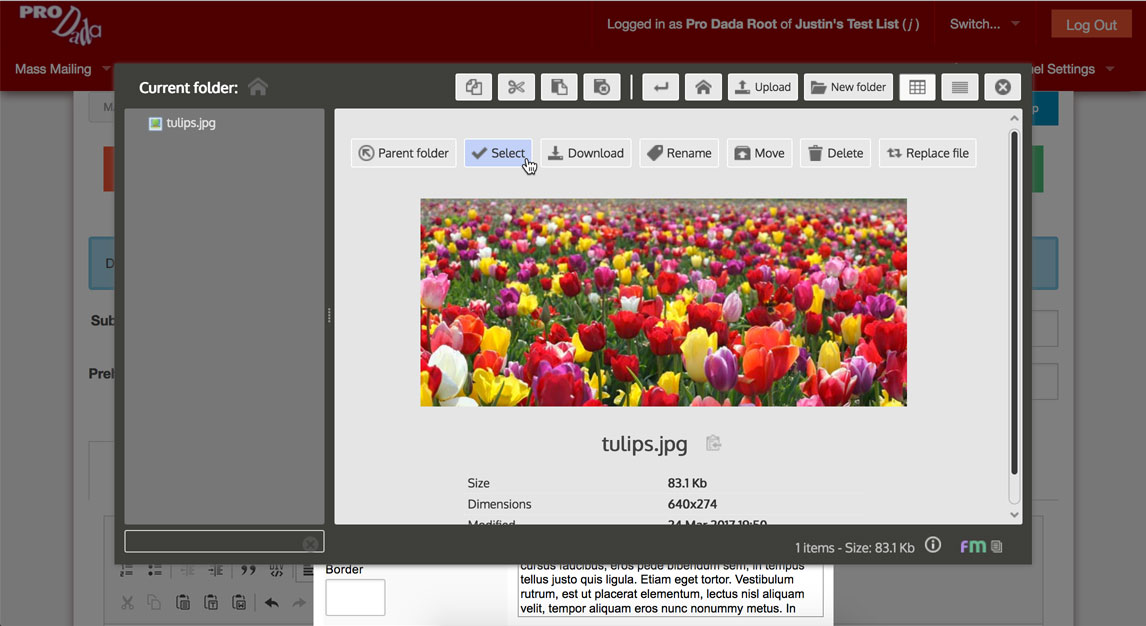
Click the button labeled, Select:
Rich Filemanager will disappear, and your recently-uploaded image will be filled in the textbox labeled, URL. Click the button labeled, OK to add the image to your message!
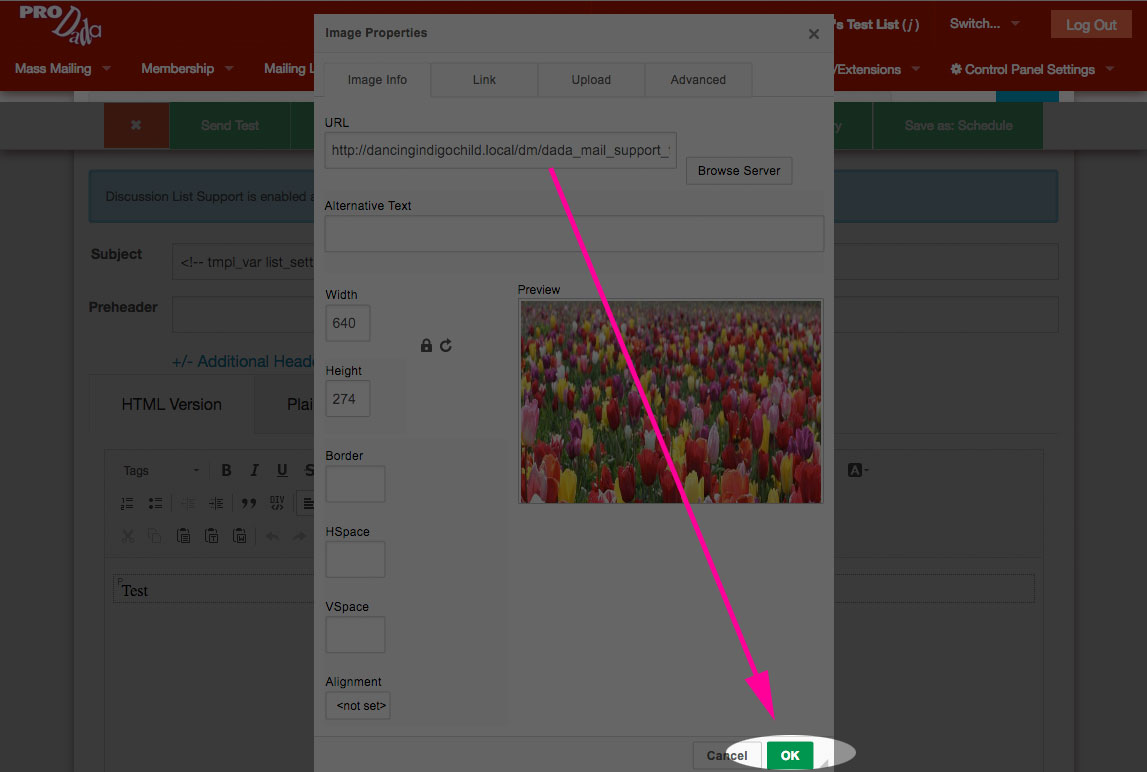
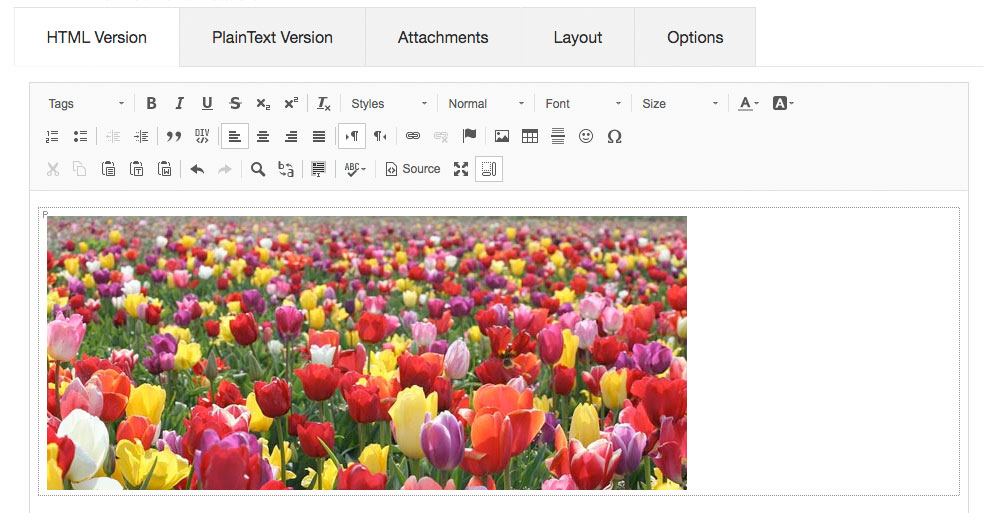
Image added!
Adding an attachment to your mailing list message
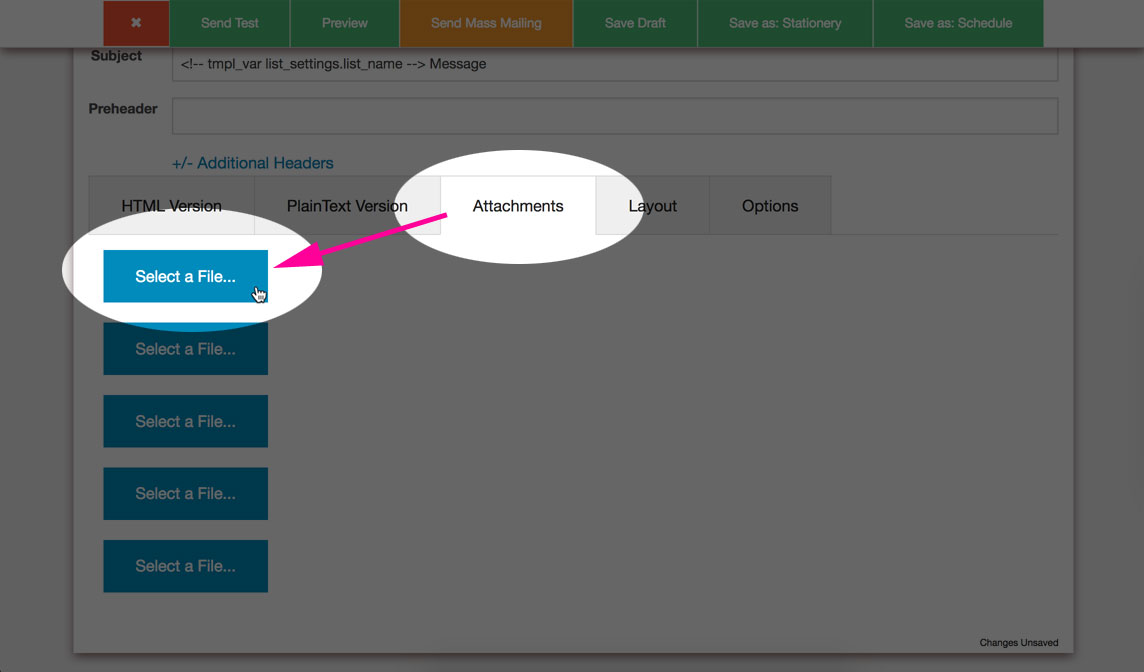
In the Send a Message screen, click on the tab labeled, Attachments. Then, click one of the buttons labeled, Select a File…
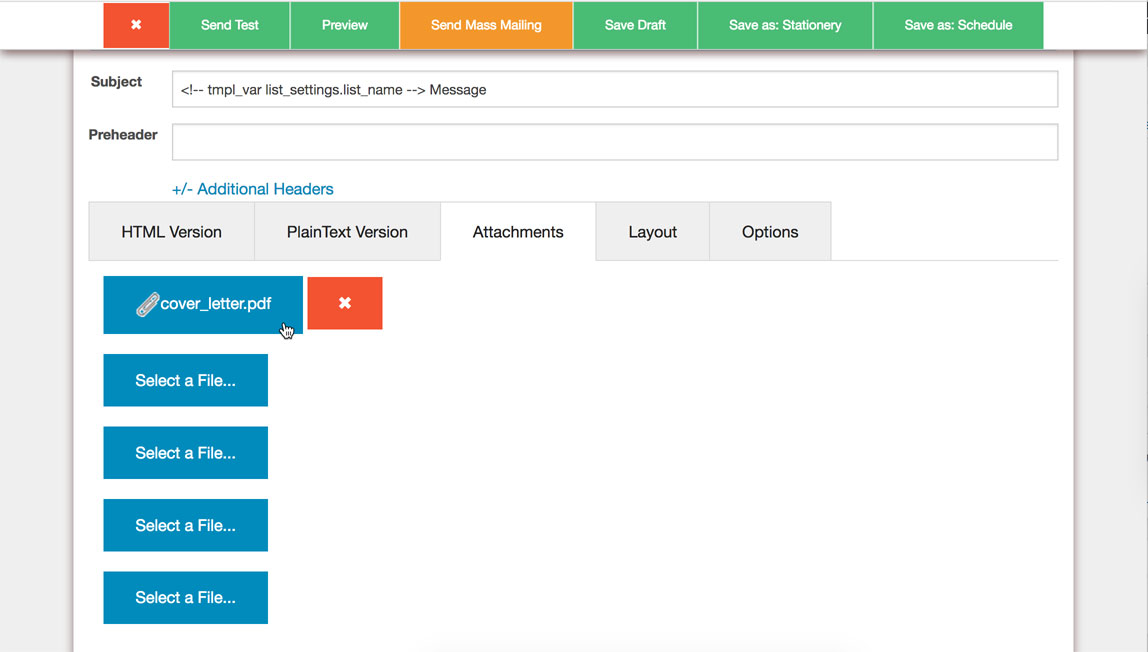
Rich Filemanager will open up in a new window, where you can upload a new file, just like you can in the walkthrough above. Once selected, the file will be shown in the button you initially clicked:
And, that’s it! Let us know how well the new Rich Filemanager is working for you!
