Test sending out your mass mailing is a great idea to do, before you commit to sending out the message to your entire mailing list.
In past versions, Dada Mail could only send only send a test mass mailing to one email address at one time.
Starting with v11.5.0, Dada Mail can send a test mass mailing to multiple addresses at once.
By default, this list of test recipients can be created per draft message by typing in the email addresses in the same text box that previously only supported one email address. By default, up to ten email addresses may be added to this text box, and sent a test mass mailing.
Additionally, a Testers List may be enabled so that the same list of addresses can be sent a test mass mailing for all draft messages. This sublist can be administrated simnilarly to your main Subscribers list.
Here’s where to find all these new enhancements:
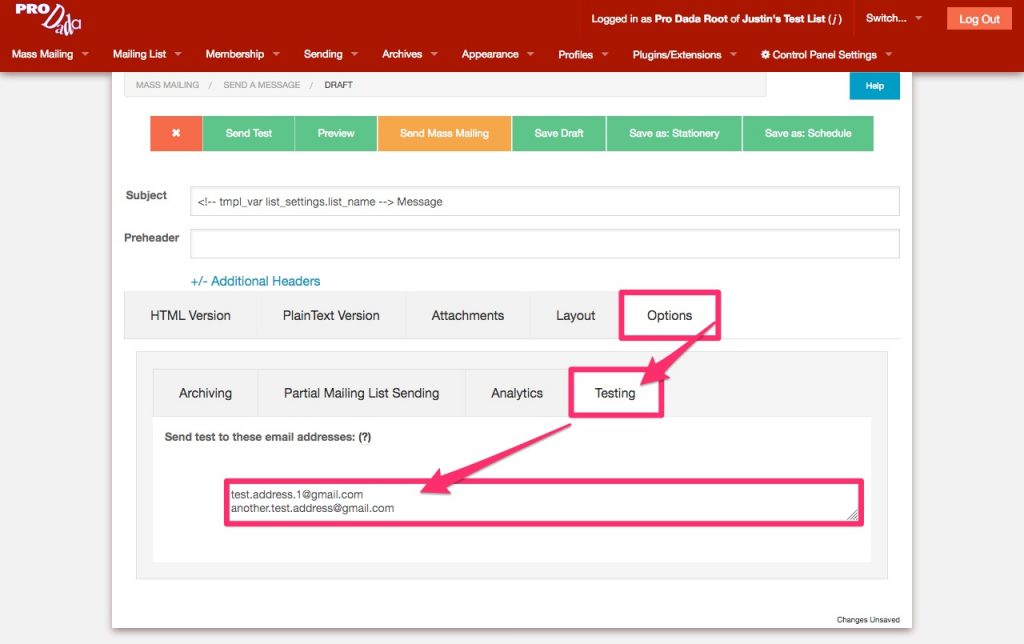
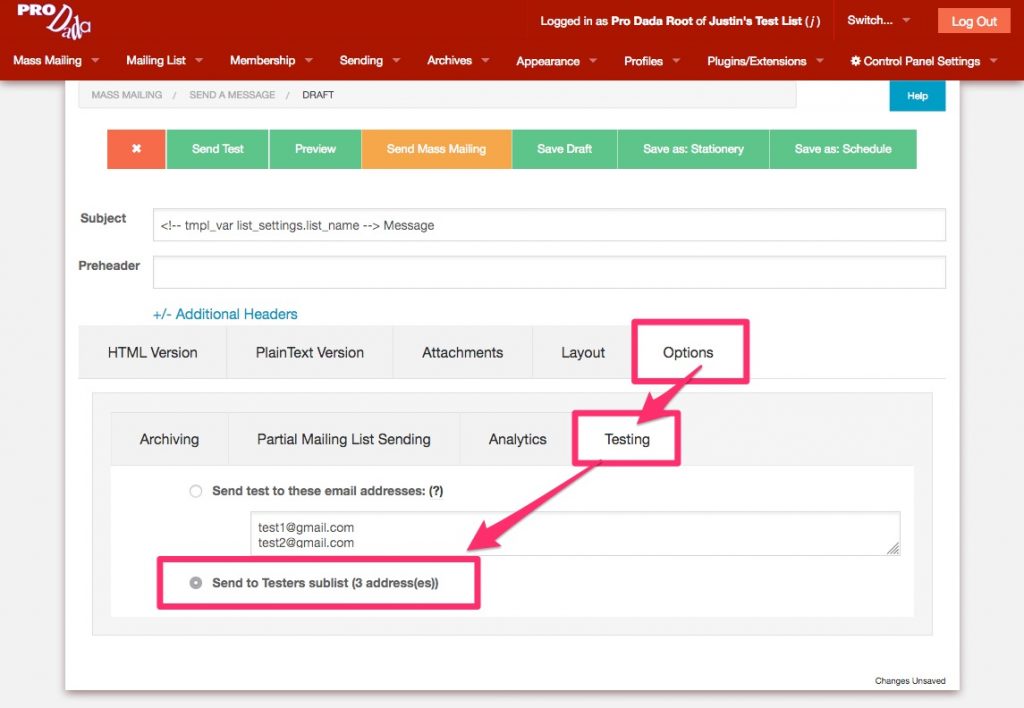
When drafting a new mass mailing, click on the, Options tab, then click on the, Testing tab. This is where you’ll find the text box to list the addresses you would like your test mass mailing to be sent to. By default, you can enter up to ten addresses (read on to find out how to change this default). Separate each address you enter in the text box by commas, spaces, and/or new lines.
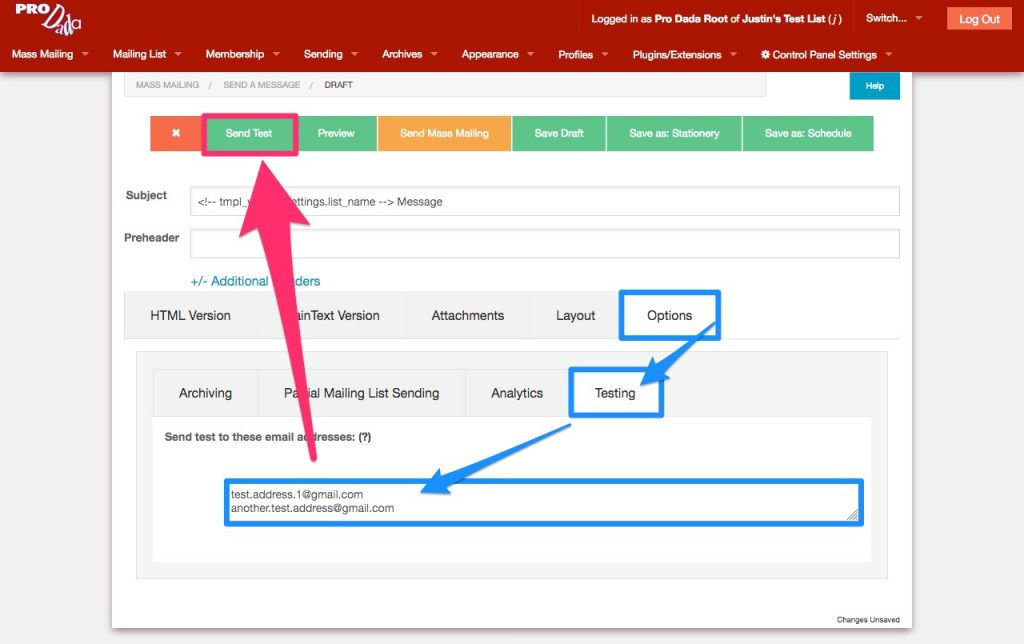
When you’re ready to send out a test mass mailing, click the button at the top of the screen labeled, Send Test.
The screen will refresh to show you the mass mailing monitor for your test mass mailing. A button will be shown at the top of the screen labeled, Return to Editing Draft.
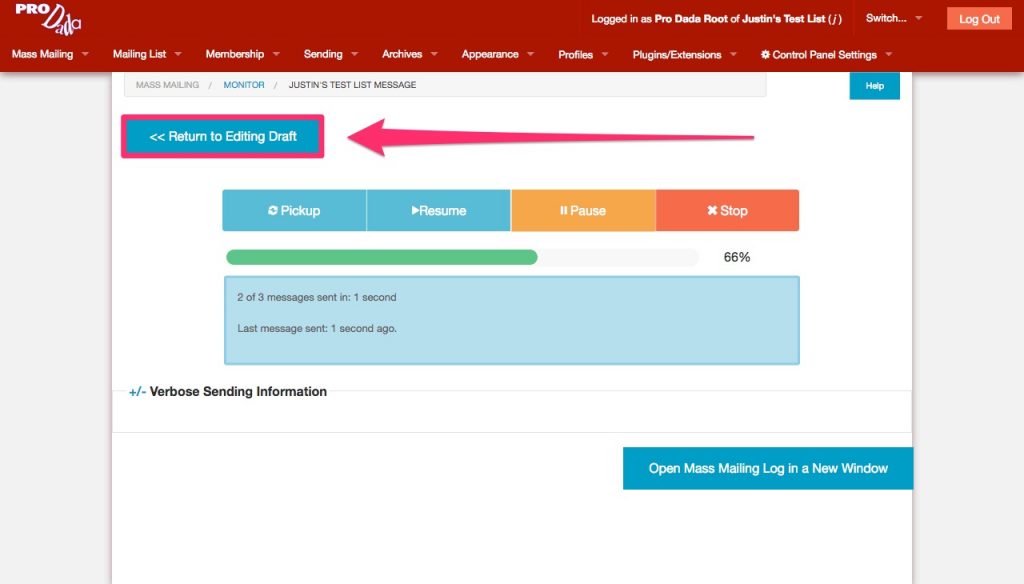
Click this button to return to your draft message, so that you can continue editing the message, or to send the mass mailing out for real. (Note: In previous versions of Dada Mail, you would never leave the draft editing screen, as only one email address would be sent the test mass mailing.)
To enable the Testers List, go to Membership: Options in the list control panel. Find the section labeled, Testers List to see the options available to you. Check the option labeled, [x] Activate Testers List to enable the Testers List.
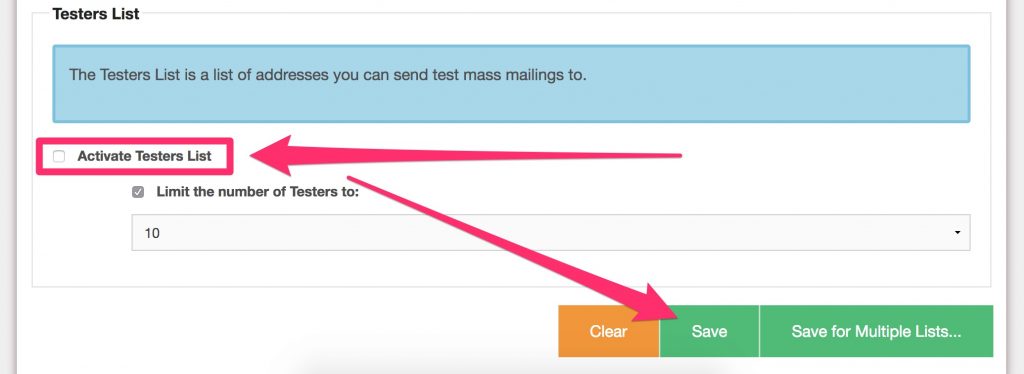
Options below this checkbox will allow you to specify if there’s a limit to how many addresses you may have in your Testers list as well as what that limit is. The limit set here will also affect how many addresses you can add to the text box in the drafts screen, per draft message.
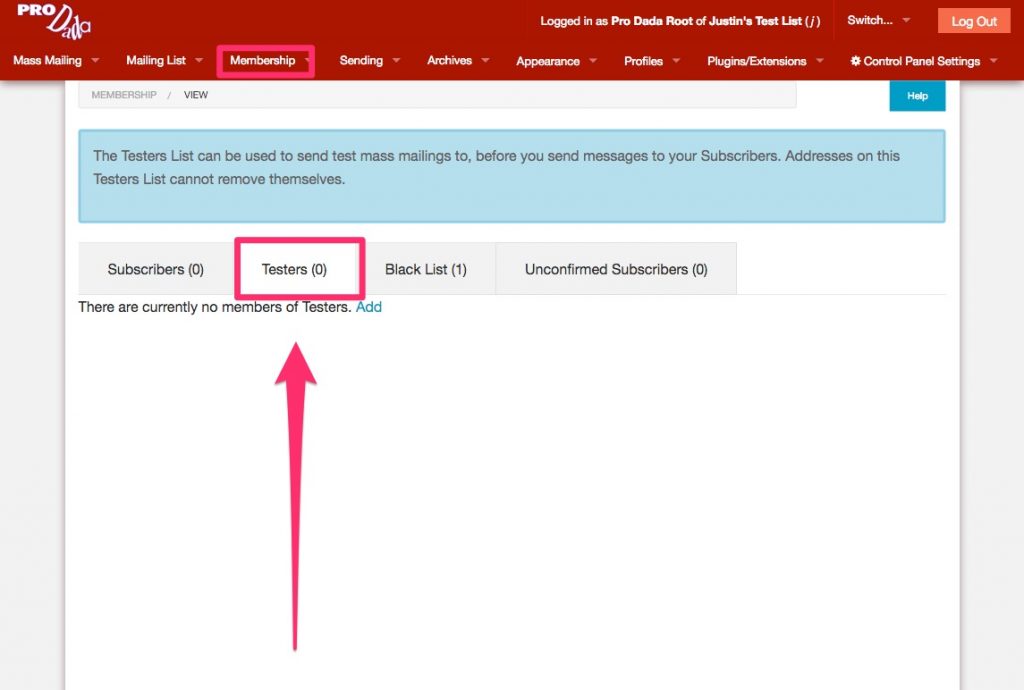
Once enabled, the Testers list can be accessed in the list control panel under, Membership View. Click the tab labeled, “Testers” to see add/edit/remove addresses in this sublist.
And once enabled, you can toggle between using your Testers list and a unique list of addresses per draft message in the draft message itself. Revisit the Options: Testers tab(s) to now see the two options available. Select, Send to Testers sublist to send your test mass mailing to the Testers.
Sending a test message can be useful in a few different ways. With a test mass mailing, you can make sure that delivery is working to specific addresses, domains, and email services, and that the email message itself is displaying correctly on a spectrum of services and devices. This can also help you get a checkoff of the content an design of your mass mailing if you’re working within a team.
There are a few things that happen differently when sending out a test mass mailing. To start, none of the recipients of a test mass mailing will be able to unsubscribe through the test mass mailing. Also, test mass mailings will not be tracked for things like Opens, Clickthroughs, or Bounces.
