We recently started offering Lifetime upgrade overage to our install/upgrade options, complementing the one-time, and yearly upgrades. We also give people the choice on if they would like us to upgrade them whenever a new release is put out, instead of having them request an upgrade from us. This can save us both time.
But, we don’t want these upgrades to come as a huge surprise, and we don’t want to stop communicating with our clients. So, we decided to set up a simple upgrade notification mailing list for our paid clients, and of course: we used Dada Mail to allow us to set everything up within minutes. Here’s how we did it:
Create a New Mailing List
First, we made a list as usual. This is going to be a private mailing list only for our paying customers and the magic will be in setting some specific options within the list control panel.
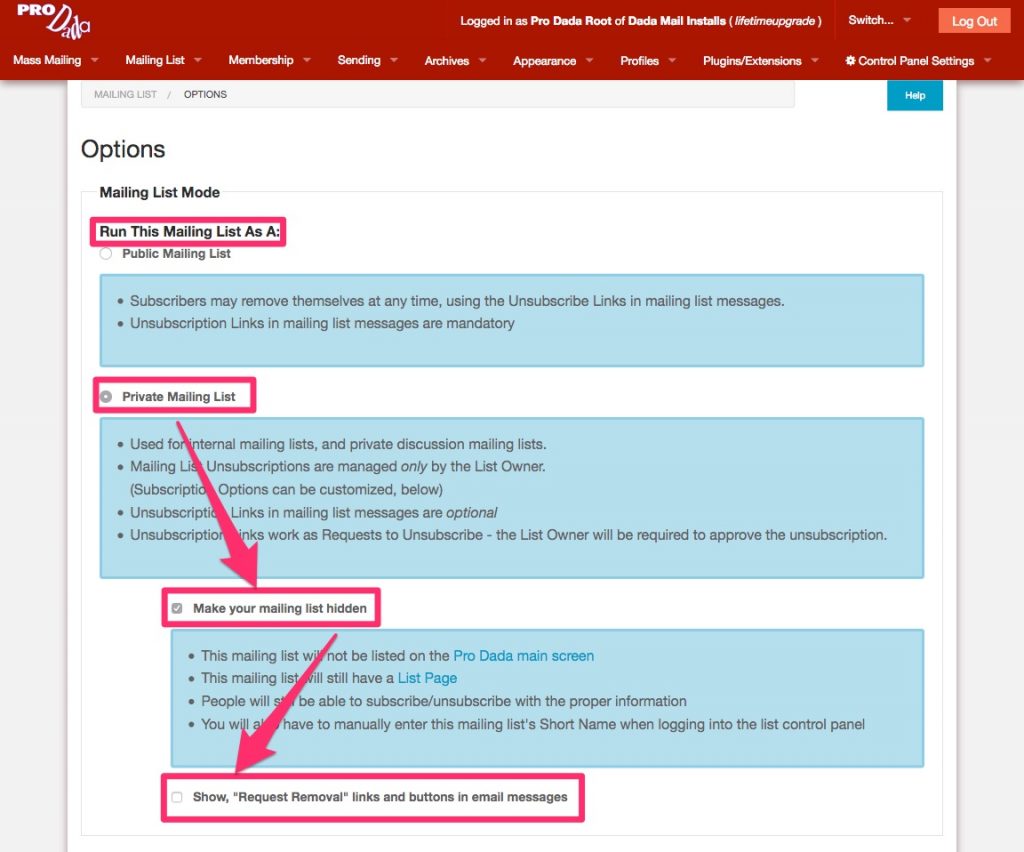
In the list control panel, under Mailing List: Options we’ll set the following:
Under, Options: Run This Mailing List As A:
Select,
(*) Private Mailing List
Then select,
[x]Make your mailing list hidden
Then, uncheck;
[ ] Show, “Request Removal” links and buttons in email messages
Under, Advanced Options: Subscriptions
Uncheck,
[ ] Allow anyone to subscribe

That will give us full control over who can be a part of the mailing list.
Set up a new Profile Field
Now, we’d love to save the location of each install with each member we add to the mailing list, so that later on when we email them, we can also include the install of Pro Dada that they have white was upgraded.
For that, we’ll need to create a new Profile Field.
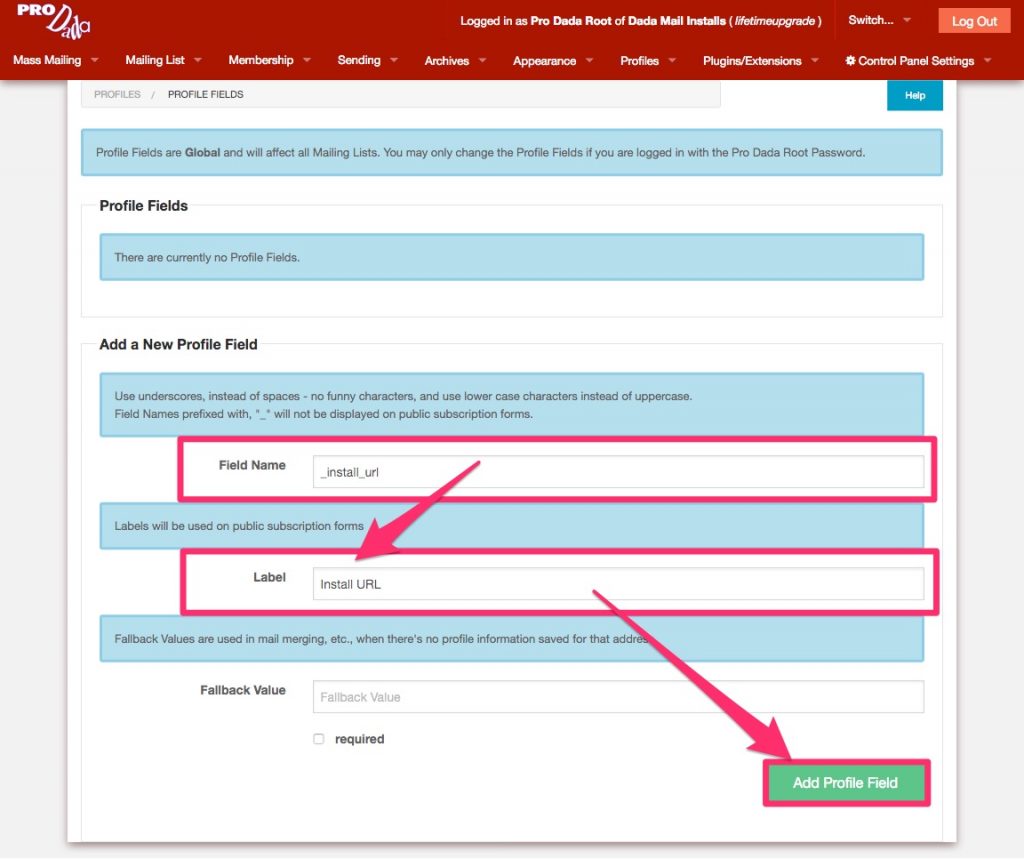
In the list control panel, go to, Profiles: Profile Fields
I’m going to make a new profile field called, “_install_url“. The underscore as the first character will tell Pro Dada to not show this profile field in any public subscription forms. I’ll label this profile field, “Install URL“. When I’m done, I’ll click the button labeled, Add Profile Field
Add Members
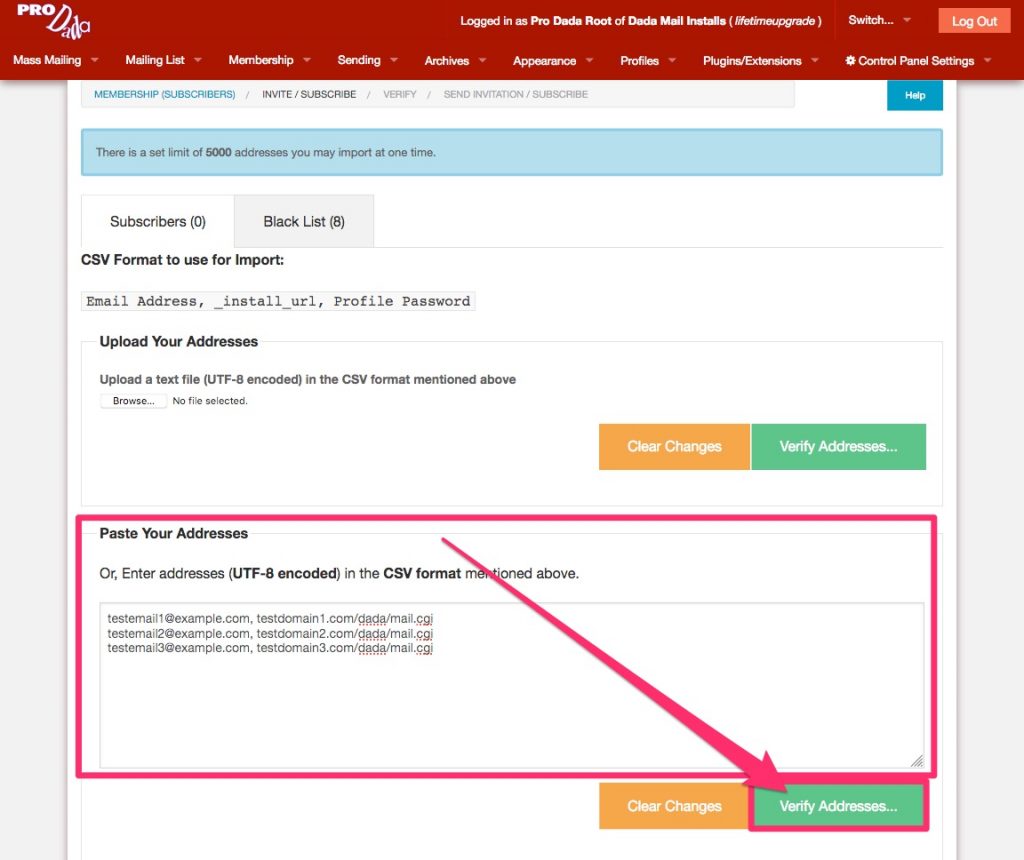
Next, I’ll add the members of this list – both their email addresses, and the URL of their Pro Dada installations. Here’s an example:
testemail1@example.com, testdomain1.com/dada/mail.cgi
testemail2@example.com, testdomain2.com/dada/mail.cgi
testemail3@example.com, testdomain3.com/dada/mail.cgi
I’ll go to, Membership: Invite/Subscribe/Add, and I’ll paste the above into the textbox labeled, Paste Your Addresses.
Then, click the button labeled, Verify Addresses…
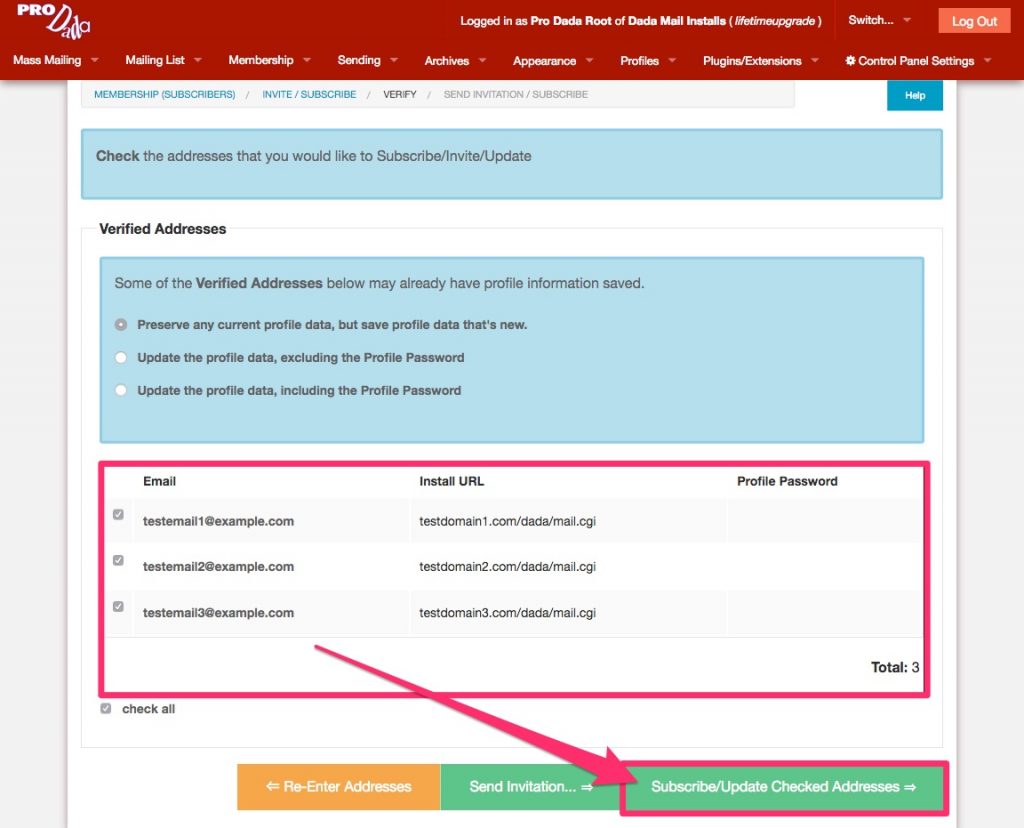
The screen will refresh after Pro Dada does its best to make sure no mistakes were made when you put in this data.
If things look good to you, press the button labeled, Subscribe/Update Checked Addresses
The screen will refresh after Pro Dada does its best to make sure no mistakes were made when you put in this data. If things look good to you, press the button labeled, Subscribe/Update Checked Addresses
Now, let’s set up a stationery message to reuse for each message we sent out:
Stationery Message
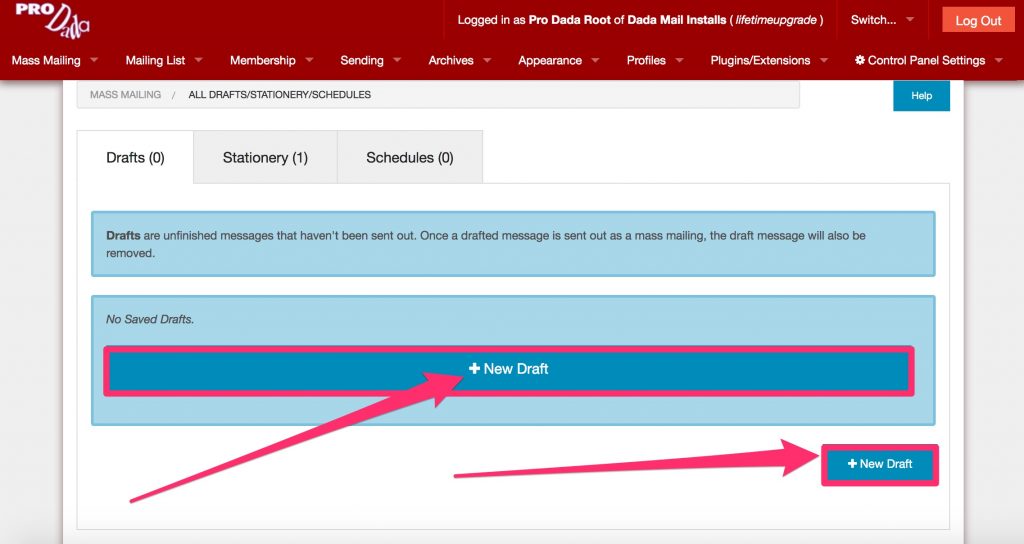
Under Mass Mailing: All Drafts/Stationery/Schedules, click on the button labeled, +New Draft
To keep things simple, I’m going to send just a plain text message, so I’ll disable HTML sending by selecting, Do not send an HTML version (only PlainText version) under the HTML Version tab. Then, I’ll click the, Plaintext Message tab, select, Write/Paste Text, and write my message:
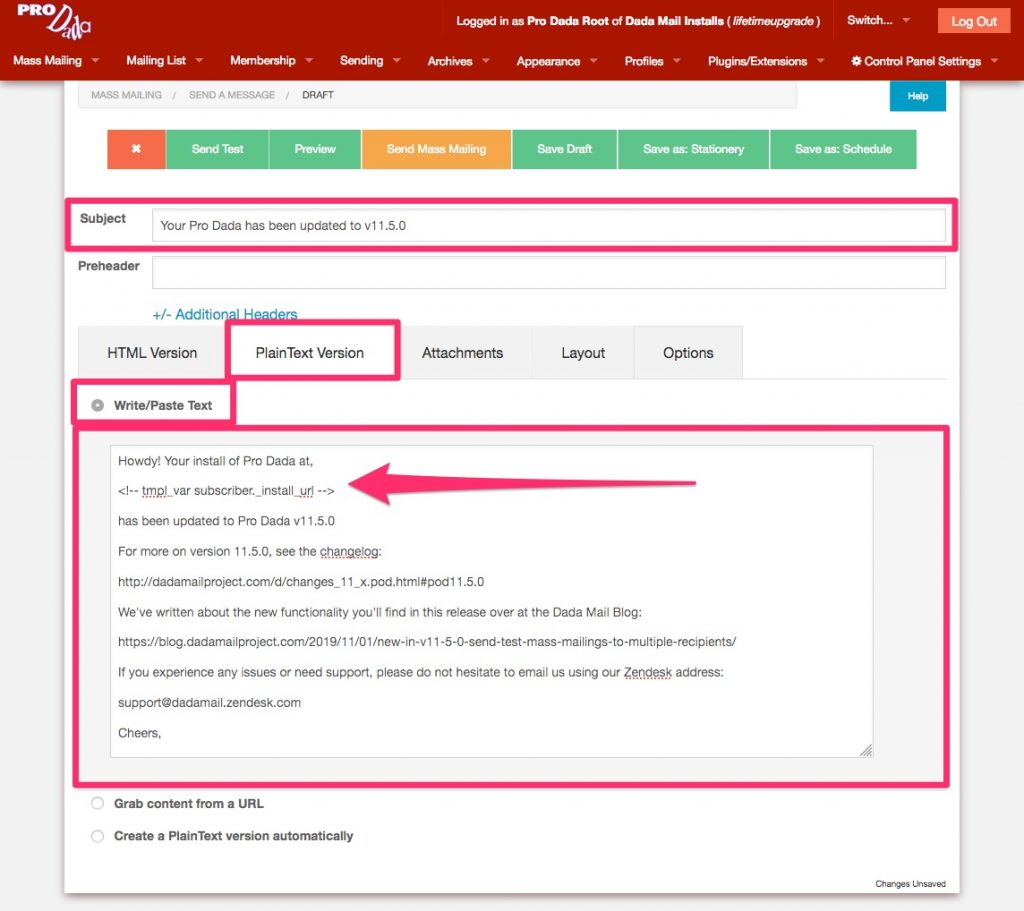
In the message, noticed we’ve used a custom template tag,
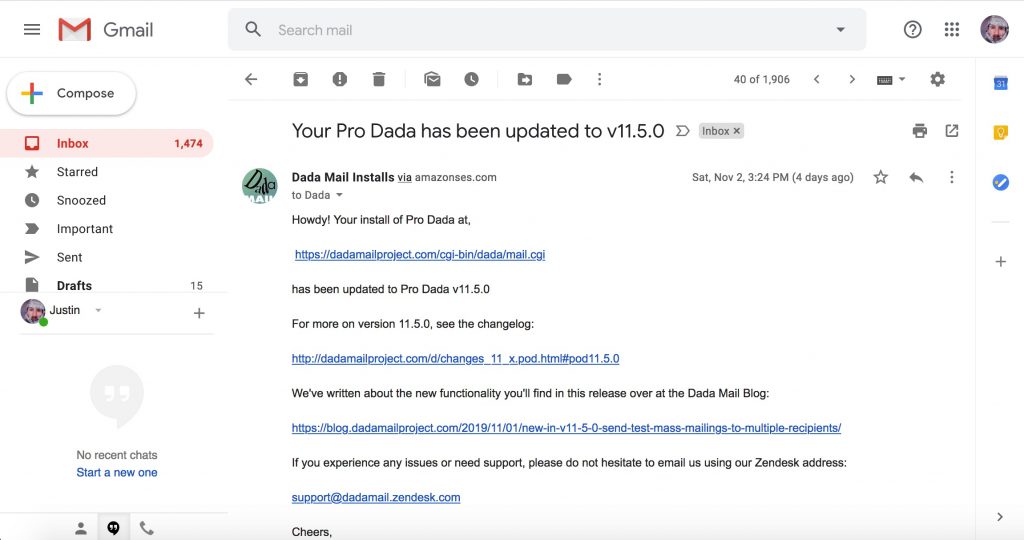
<!-- tmpl_var subscriber._install_url -->“_install_url” is the name of the custom Profile Field I just set up, and when Dada Mail sends out this message, this tag will be replaced by the value that is saved along with the rest of my member’s information (like their email address).
Once we’re happy with the Stationery message, we can then save it, by clicking the button labeled, Save As: Stationery. This will turn the Draft message into a Stationery Message, which we can then use to create new Draft messages.
Sending out our mass notification
Now, let’s say a new version of the app has been released. We do our upgrades, and now it’s time to send out the notification:
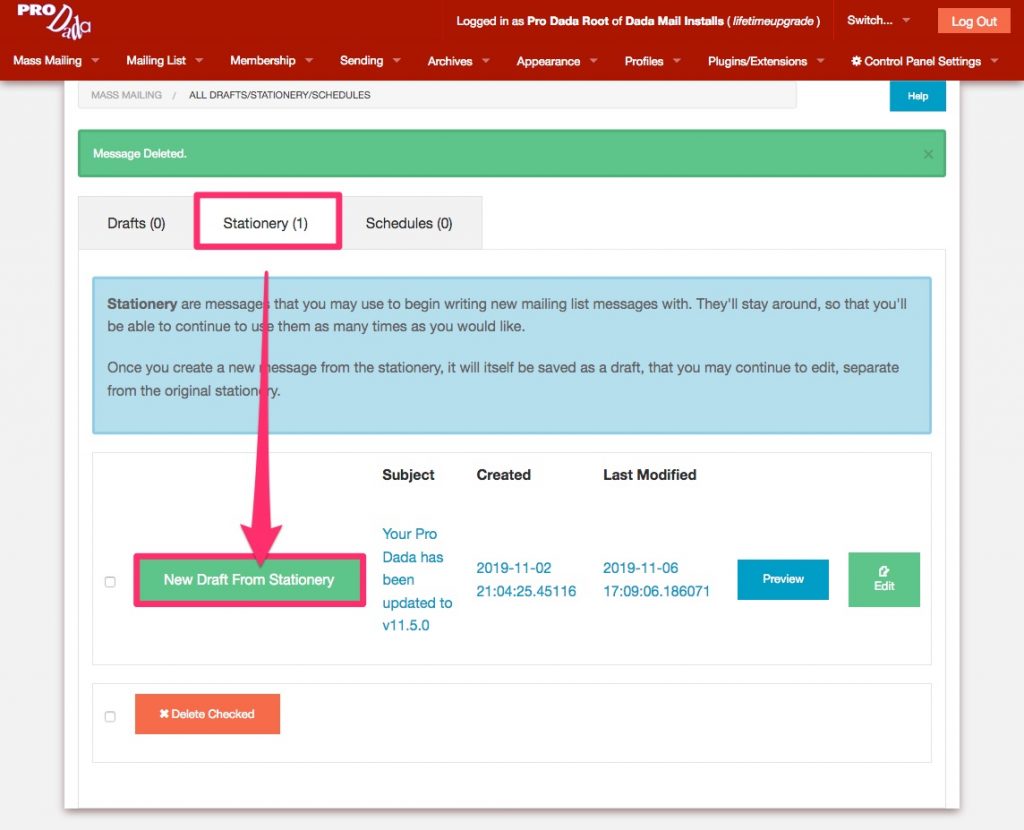
In the list control panel, we’ll go to, Mass Mailing: All Drafts/Stationery/Schedules. Click on the tab labeled, Stationery. Next to the Stationery we made before, click the button labeled, New Draft From Stationery.
Once the Draft is loaded in, we may have to make a few slight tweaks to the message (like making sure the version number is correct! Once everything is ready, we can send out our mass mailing, alerting our subscribers their upgrade is complete.
In a followup blog post, we’ll describe how we can automate this whole process using Dada Mail’s RESTful API, hooking it up to an already existing app we may have.
